

I have been trying to clean out the
albums on my phone and
I found these pictures.
I had participated in a 3 color challenge
a few months ago.
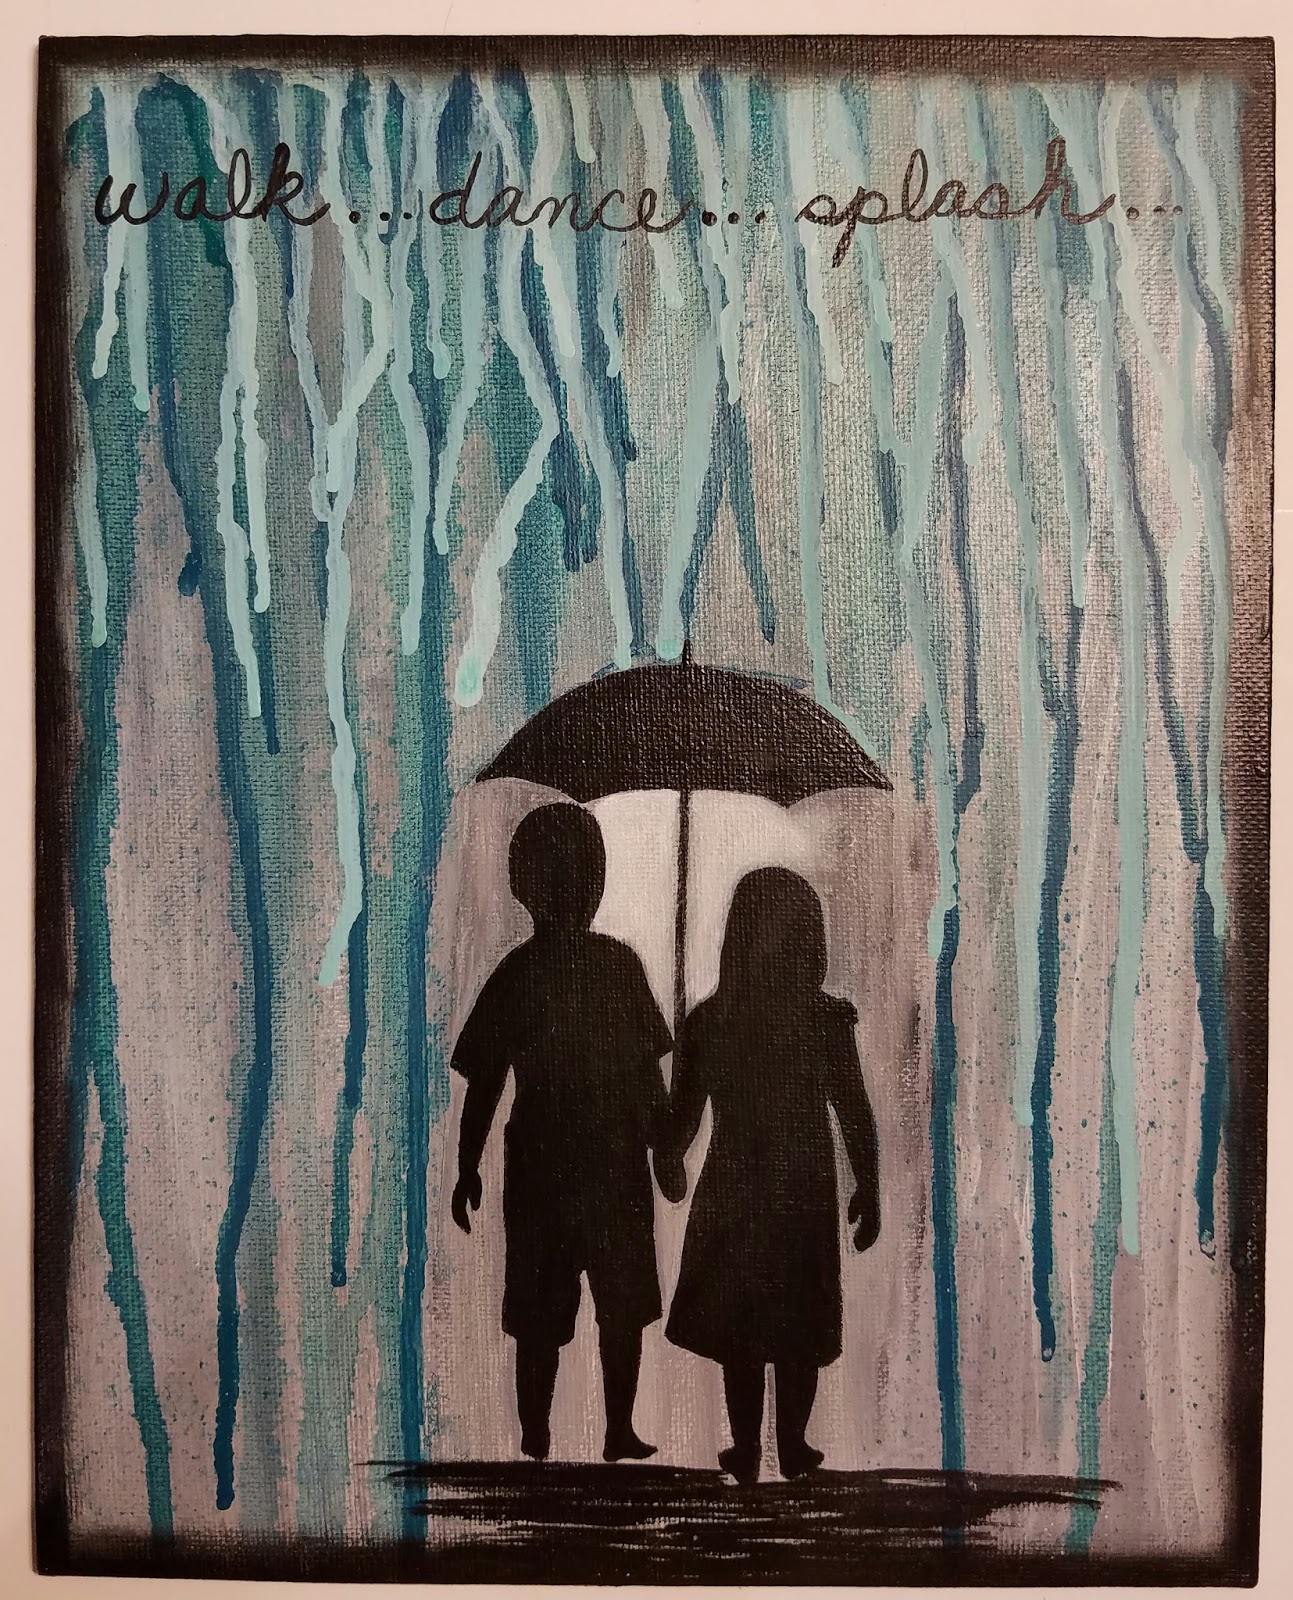
I had seen a video where an Artist took Crayons and melted them for the rain, so I thought I would see what I could do with the same concept using DecoArt Media Fluid Acrylics.
For the challenge,
we were to use Black and White
and then choose another color.
I chose Cobalt Turquoise Hue.
I used 2 Andy Skinner Stencil:
Children and Acessories
Whew--I am not a stenciler, but I keep trying.
I used a small spritzer for my water.
I picked up the spritzer at JoAnns.
I LOVE this little tool.

I began by creating the background with a
mix of Black and White.
I didn't want to over-mix my colors,
or I would have simply ended up
with a muddy mix of Grey.
There was no rhyme or reason
to adding the colors.
I simply picked up some Black,
then some white,
then some more white,
or some more Black...
I stopped when I liked it.
IF you do get a muddy mix,
stop and allow the paint to dry,
then begin again.
It is JUST PAINT!
I kept the strokes in a North/South Direction.
Of course, you can try something else.
I kept the strokes in a North/South Direction.
Of course, you can try something else.

I stenciled the children and the umbrella and
boy, howdy, again,
I want to emphasize that
I cannot stencil! LOL
BUT as I keep saying,
it is only paint,
so I pulled out my 10/0 liner
and repaired the blobs as best I could.
I was a bit stressed,
so I forgot to take pictures.
I applied painters tape to cover the children.
I wanted the rain to fall around them.

I blobbed the Cobalt Turquoise Hue across the top,
and spritzed it with water so it would run.

This was a process..
More Paint...
More water...

Finally, I just thinned my paint really thin
and dabbed it across the top.
I kept doing this until I liked it.
I then added some white to the Turquoise
to give it some depth.
Remember--Shading (dark) pushes your object
BACK into the background.
Highlighting (light) brings the object
to the FRONT.
Your goal is to have a
shadow, the primary color, and a highlight
Of course, you can use many colors
and layers to achieve this.
That is the fun of playing with paint.

I added a white Highlight between the children.
I thought of it as a lamplight.
Black was added under the children to ground
them into the picture.
The lettering was added with Black.
I dry brushed Black all around the edge
to give it a FRAME
This was a very quick project.
This is an example of being able to create ART
without having great artistic skills.
I always want people to know that
THEY CAN CREATE.
Things like this are great ways to learn
shadows and highlights.
As with anything~~
PRACTICE PRACTICE PRACTICE
I hope that YOU make time to
do things that you love.
Grab a canvas,
3 bottles of paint
Some brushes
and
CREATE!!
I am simply
blessed to create~charlotte♡
No comments:
Post a Comment
Thanks for stopping by my little corner of the world. In case you haven't been told, you are loved!~~charlotte♡