About Me

My photo
I LOVE to design and to paint whimsical items that will put a smile on your face. Each day I share my simple life with you as I try to encourage, to inspire and sometimes JUST to make you smile as I recount my life growing up on a dairy farm! I've never had many material items in my life, BUT I have been blessed beyond words with love and encouragement from WONDERFUL Parents who instilled in me WHAT was important. I have had EVERYTHING that I needed and WAY too much of what I wanted. I am slowly learning to be a better person each day through my interactions with my friends on Facebook. Some day I hope to be as good as people seem to THINK I am! I am BLESSED! Welcome to my little corner of the world...Please stop by and visit often!
Showing posts with label hand painted. Show all posts

Saturday, March 17, 2018

It is well...


I have been having fun learning different styles and using different supplies.

I have learned palette knife painting. It is fun, but it will never replace my traditional style of painting.

I started these canvases with the intent of painting my home church on them for a childhood friend, but cancer took her life, too soon, and I tossed them aside.

I recently reached a little window of being caught up, so I drug these out, again, and wanted to finish them.

I wanted them to be primitive, and similar to all the palette knife churches that are all over pinterest so I think that I was successful.  I simply used a #12 Flat, and using the dirty brush method, and by George, I liked it!

This is similar to my home church.

I have shared this before, but Mother was a Southern Baptist and Daddy was a Christian, until he met Momma!
😁😂🤣😃

When Mother and Daddy got married,  they agreed to find a church where they both could attend each Sunday, together.

They found Mt. Denson Cumberland Presbyterian Church.

It was a small white wooden country church that had added a basement and a brick wing of 4 rooms.

There was a slab of concrete in front that held 3 beautiful maple trees.

I would play "1,2,3 Red light" AND "Simon Says" with my friends.

The people would gather there, after church and fellowship and share. The left top corner was jokingly called "Amen Corner."

Fast forward about 50 years, and 2 new renovations have been made...the elders are dead, and so, pretty much, is the church. It is a sad thing to watch.

I hold special memories of this church. I try not to reflect on the many hurts.

Mother and Daddy served faithfully, and so did I. I taught many classes, sang many songs, played numerous hymns and designed many a floral arrangement to share on the altar.

I did my best to share the gifts God gave me.  I was taught about service, the Bible, our Denomination, and our heritage.

I made mistakes. Got angry. Said hurtful things. Acted like a brat.

I learned about forgiveness,
mercy and grace.

I wish I had never grown up to see the ugliness of churches. 😔

So, today marks 6 years
since we buried Momma.

It was truly a celebration of her life. We sang hymns, and our former pastor spoke of God's invitation of love.

Mother shared John 3: 16, 17 with people around the world.

She lived Love.

She was my greatest supporter.
Every time I showed her a new creation, she always told of someone that she would like to give it to. 😁😂🤣😃

I have found myself developing her giving spirit. I think she would be proud!

So in her memory, you may have this pattern. I will leave it here until the end of the month.


Click here to download the Free Pattern

If you have trouble downloading it, just send me a message and I will email it to You!
romaland2.1@juno.com

Each day, I am reminded of how blessed I was. I hope you have known that kind of love. If not, let me tell you about my Heavenly Father, who loves you unconditionally.


Make time to create!
It will fuel your soul.

I am simply blessed to create~charlotte♡


Thursday, October 26, 2017

Classic Halloween Club

I told you I would show what I did with much of my time this summer.

Here it is.


I  joined the Amy Mogish
Classic Halloween Club. 


We got 3 ornaments each month for 4 months. 


 I am not going to lie to you.


I joined, simply to support a friend.


I think that is important to do.


So, to be honest again, I loved them so much that I ordered a second set to paint!


I painted a set to give to a Friend for her birthday.


She bought the trees for us, so I decided to be nice and paint the other two sets for her!
😁😂🤣😃


I am pretty good about duplicating the style of another painter, but, I was having a tough time duplicating the style of Amy.


She definitely has her own style.
That is a good thing! Lol


I could not get my Soft Blacks,  Graphites, Lamp Blacks, Neutral Grey, Slate Greys...to show against each other--whew!


Amy did a video on her blog, and, finally, I saw the LIGHT  (of all the dark)
😁😂🤣😃😄


I soon started to kid Amy about joining the "dark side".


 I wanted to make certain that she knew I was joking, and in no way, was being mean spirited.


I often hurt people's feelings with my joking.
I am working hard to stop doing that.


I am so glad that I joined the club.
She gave us the patterns for the fronts.
We painted the "back sides" as we wished.
I have NEVER had my "back side" talked about so much in a very long time! 
😁😂🤣😃😄


I find myself putting her style into my work.


I am also happy that I have gotten a chance to love Amy.


We are now, connected through heART!


oh, and our friend, Sheila Landry, did an amazing job providing us with the surfaces.


I feel that I have, once again, grown as an Artist, by stretching my boundaries and learning some new techniques.

This is one to add to your list.

The project will be available at Club prices until June 2018
I can't wait until the next Club!

I am simply blessed to create~charlotte♡


Friday, May 19, 2017

One Petal, 2 petals, 3 Petals, 4!

Why would I ever agree to try to duplicate something!

Good grief.

Once you do it, it is a one of a kind.

But my friend asked for tips, so tips I shall give. Well, I will share pictures. 

Nope, the second one was not like the first one and the third was like neither the first  nor the second.

My background insisted on being darker and richer, so I just went with it!

The technique is the same, just don't add as much paint!

I have painted flowers for years,  but started enjoying the whimsicals more and more, so I had not painted a flower in several years.

I have a college friend that likes hydrangeas, so I planned to paint her this bowl before Christmas. Yes, I finally did last weekend, and she FINALLY got it as a RAK on Wednesday.

Yep, I am nothing if not the world's best procrastinator!  
Mother said that whatever you do, do the best you CAN!
I am an expert.  Of course, we all know that an expert is only a drip under pressure!  ;)

I learned to paint flowers mostly from Donna Dewberry books and books by Ross Stallcup. I changed them to suit my taste, as most painters should. I was AMAZED to find that some designers do NOT like people adding their own touches to designs.  I won't give my opinion on that, but you can probably tell! Lol

I feel kinda silly adding my tips for painting a hydrangea, since there are TONS of patterns out there. I recently bought a video from Maureen Baker, and discovered I had been doing it right, all along, not that I am certain there IS a right way.

There probably are lots of videos on YOUTUBE,  also.

But here I am...sharing that YOU can do this.

I will put a "pattern" in my etsy shop, so click on this link to go  To my etsy shop.  The price is $5 for those who wish to have this in pattern form.

Hey, visit my shop and see what I do.  ;)

I use filberts to paint most all of my flowers.  Use the appropriate size for the surface you are painting

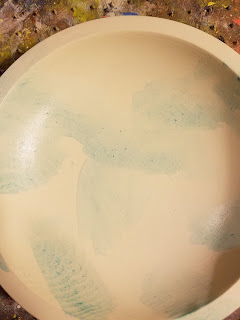
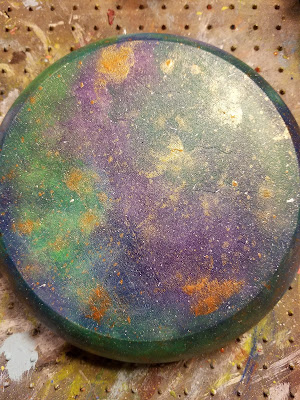
The background was created using DecoArt Media Fluid Acrylics: Cobalt Turquoise Hue, Dioxazine Purple, Yellow Green Light.

I flecked it with my choice of  Dazzling Metallics.

You may chose any color to paint your flowers.  Choose a dark (pretty dark), medium and a Light Color--most any of the whites would work.

Hydrangeas come in many different colors.

For the stems/leaves, use your favorite greens. Again, choose a Dark, medium and light green.

Here are the step by step pictures.

Enjoy and I hope you will give it a try!


sorry, this is out of order, but I didn't want to have to move it...


This was the original piece

These are the 2 that
I did trying to duplicate
the first one...heavy sigh...LOL


Here is the link to buy the pattern for the hydrangea

I hope you will try different things.
Learning is fun!
I am simply blessed to create ~ charlotte♡