About Me

My photo
I LOVE to design and to paint whimsical items that will put a smile on your face. Each day I share my simple life with you as I try to encourage, to inspire and sometimes JUST to make you smile as I recount my life growing up on a dairy farm! I've never had many material items in my life, BUT I have been blessed beyond words with love and encouragement from WONDERFUL Parents who instilled in me WHAT was important. I have had EVERYTHING that I needed and WAY too much of what I wanted. I am slowly learning to be a better person each day through my interactions with my friends on Facebook. Some day I hope to be as good as people seem to THINK I am! I am BLESSED! Welcome to my little corner of the world...Please stop by and visit often!
Showing posts with label painting tutorial. Show all posts

Thursday, January 19, 2017

Rain--Tutorial Thursday

I have been trying to clean out the 
albums on my phone and 
I found these pictures.

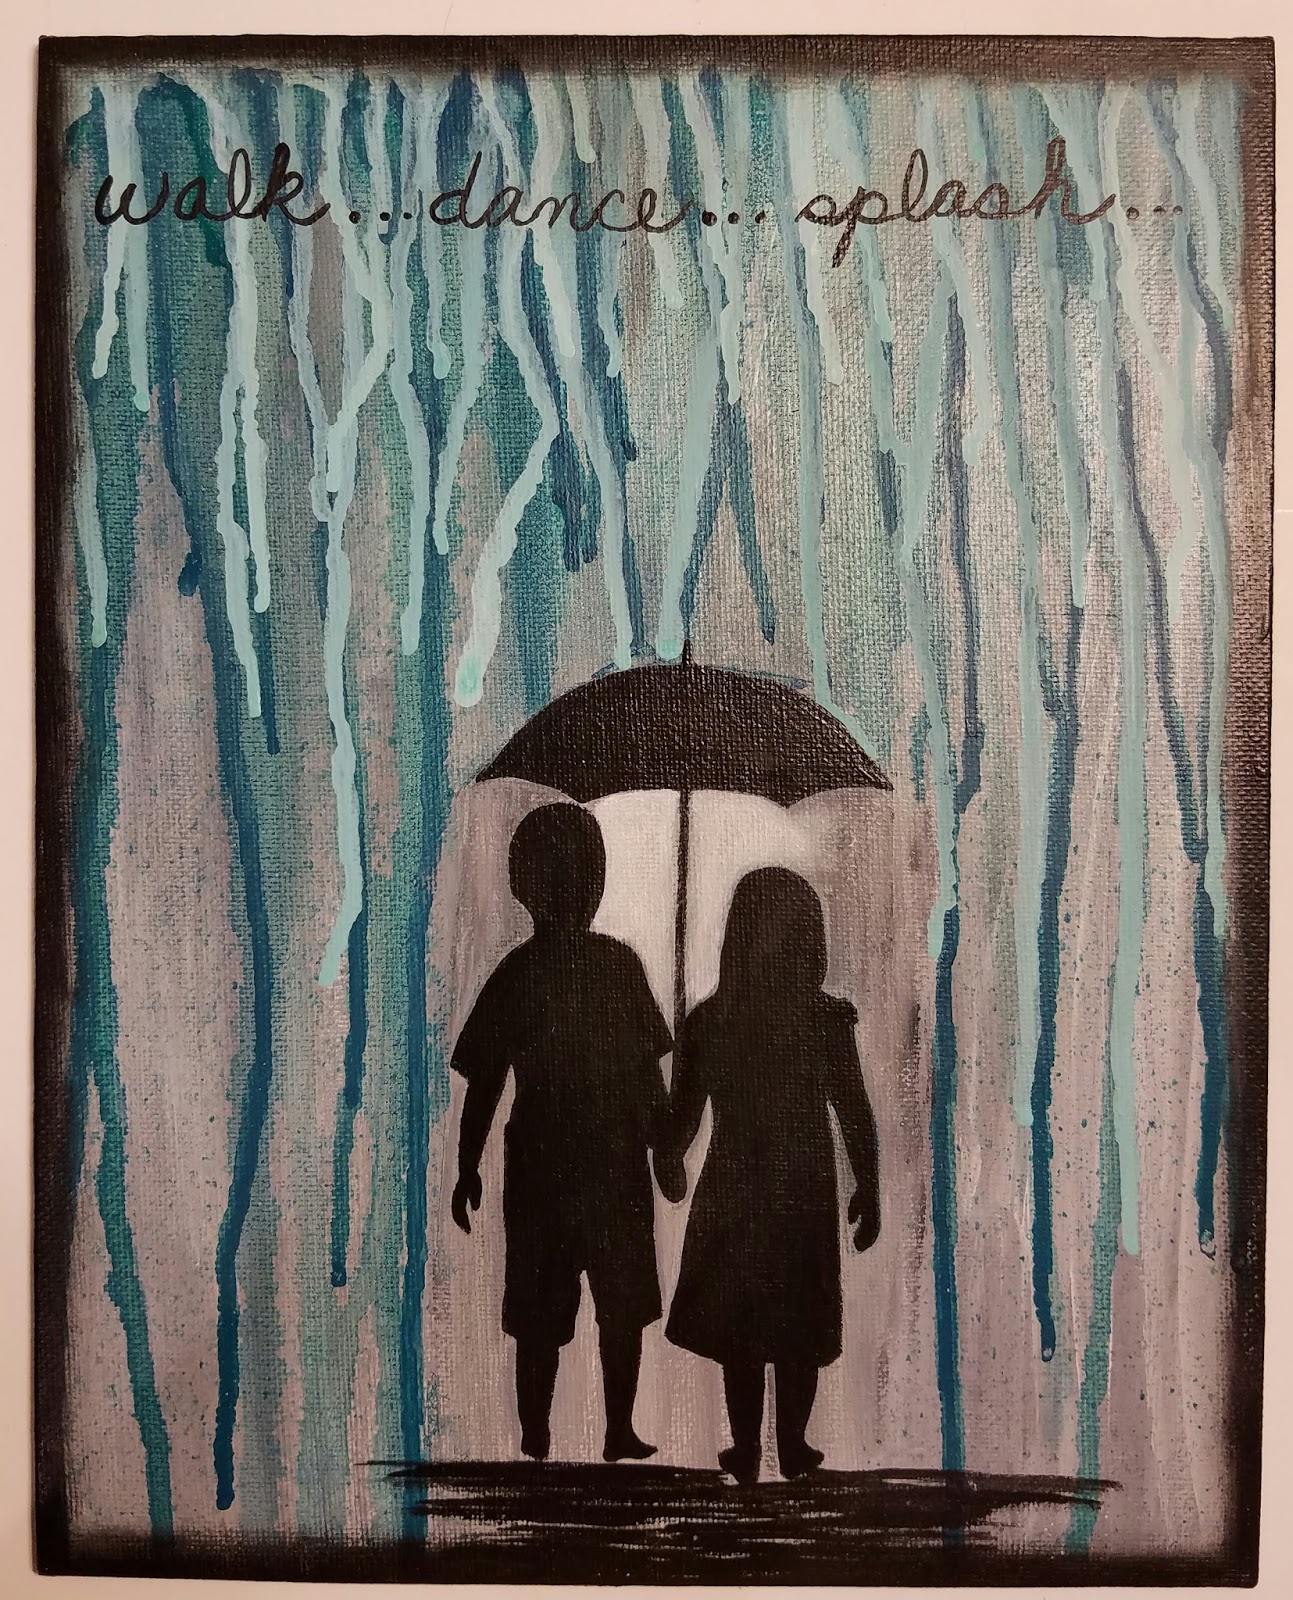
I had participated in a 3 color challenge 
a few months ago.

I had seen a video where an Artist took Crayons and melted them for the rain, so I thought I would see what I could do with the same concept using DecoArt Media Fluid Acrylics.

For the challenge, 
we were to use Black and White 
and then choose another color.

I chose Cobalt Turquoise Hue.

I used 2 Andy Skinner Stencil: 
Children and Acessories

Whew--I am not a stenciler, but I keep trying.

I used a small spritzer for my water.
I picked up the spritzer at JoAnns.
I LOVE this little tool.


I began by creating the background with a 
mix of Black and White. 
I didn't want to over-mix my colors, 
or I would have simply ended up 
with a muddy mix of Grey.
There was no rhyme or reason 
to adding the colors.
I simply picked up some Black, 
then some white, 
then some more white, 
or some more Black...
I stopped when I liked it.
IF you do get a muddy mix, 
stop and allow the paint to dry, 
then begin again.
It is JUST PAINT!

I kept the strokes in a North/South Direction.
Of course, you can try something else.


I stenciled the children and the umbrella and 
boy, howdy, again, 
I want to emphasize that 
I cannot stencil!  LOL
BUT as I keep saying, 
it is only paint, 
so I pulled out my 10/0 liner 
and repaired the blobs as best I could.
I was a bit stressed, 
so I forgot to take pictures.

I applied painters tape to cover the children.
I wanted the rain to fall around them.


I blobbed the Cobalt Turquoise Hue across the top, 
and spritzed it with water so it would run.


This was a process..
More Paint...
More water...


Finally, I just thinned my paint really thin 
and dabbed it across the top.
I kept doing this until I liked it.
I then added some white to the Turquoise 
to give it some depth.
Remember--Shading (dark) pushes your object 
BACK into the background.
Highlighting (light) brings the object 
to the FRONT.
Your goal is to have a 
shadow, the primary color, and a highlight
Of course, you can use many colors 
and layers to achieve this.
That is the fun of playing with paint.


I added a white Highlight between the children.
I thought of it as a lamplight.
Black was added under the children to ground 
them into the picture.
The lettering was added with Black.
I dry brushed Black all around the edge 
to give it a FRAME

This was a very quick project.
This is an example of being able to create ART 
without having great artistic skills.
I always want people to know that 
THEY CAN CREATE.
Things like this are great ways to learn 
shadows and highlights.
As with anything~~
PRACTICE PRACTICE PRACTICE

I hope that YOU make time to 
do things that you love.

Grab a canvas,
3 bottles of paint
Some brushes
and 
CREATE!!

I am simply 
blessed to create~charlotte♡

Thursday, October 13, 2016

Technique Thursday: Multi Surface Paint

Well, now, I guess I thought the elves would finish this post for me.
There they were, just sitting on the shelf above the laptop.


I did, after all, add all the pictures and then promptly 
went about my day doing...

hmmmmm...what was I doing?

I do remember there was some ice cream at one point.
Oh, well, WELCOME to my world! 

I thought I would share some tiles that I painted using 
DecoArt Multi-Surface Satin Acrylics


I had a special order for 4 tiles.
I have a habit, not necessarily a bad habit, of painting more than needed so my customer can have a choice.
I want them to be happy.
So, these are the tiles that I painted.
She chose the first four.


This is a design by Betty Bowers that 
I painted using these paints.
Isn't he cute!!


I haven't used this paint for very many things.
It is very similar to using water-based Enamel Paint.
You can't add water to it, or it will ruin its adhesive quality.
I have no problems with not using water since I learned to paint using the "dirty brush" method, 
meaning that I added my highlights/shading by working them in with the base coat.
It was all I knew to do, and it is similar to 
how one would paint with oils, 
but I have never done that, either...LOL

These paints are very translucent, so I base my design with white.
You may add White to your paint to help make them more opaque,
 but I am ok with that; however, I DO wish the black were opaque, 
but I can live with it for a bit.


I free-hand many of my paintings.

The colors I used were:
Black Tie, Cottonball, Pumpkin Patch, Paprika, True Blue, leprechaun, coffee bean, muted Gold, eggplant, red barn


Shake the bottles really well.
I discovered that the paint seems to separate easily.
I thought I would share how to paint a very easy bird.
I showed you how to paint a pumpkin, so let's add to it.
Start by making a ZERO for the bird's body.


Add the two sides to the Pumpkin and add the tail to the bird, simply by making a rectangle.
Make the end of the tail jagged.


Base the colors.  
For the bird, I added White to the True Blue to make it lighter.
Notice on the bird, I left a little of his belly white.
I also added two little lines for his beak.
I added two coats of each color.


I thinned the Red Barn and added it to the belly.


 Add the beak with Muted Gold.
Use a flat brush and add Paprika to the edges of the pumpkin.
I added some Muted Gold to inside the pumpkin, too.
Add the eye to the bird with Black Tie, 
followed with a dot of cottonball.
Using the darker True Blue, add some lines to the tail 
and add a little to the top of the bird.
Outline with Black Tie.


Add a vine with Black Tie.


Use a White Charcoal pencil to make a line to 
write a message across the top,
Notice how icky the writing is?
Add "berries" with Eggplant.
Mix some cottonball with the eggplant 
and go over the "berries" again. 
The leaves are leprechaun.


Go over the writing again, and it looks fine.
I tried to use the very tip of the liner brush 
and kept a good amount of paint on the tip.

hmmm...not the best writing, but not too bad...
I think I will scratch off that "i" 
and try that again...LOL

Hey, it is JUST PAINT!


I hope this will inspire you to try some painting.
Really, anyone can do it IF they wish to!
Share with me if you try to paint this or something similar.
It never hurts to have a "birdie in your pocket" to paint!

Thanks for stopping by my little corner of the world.
Leave me a comment, if you wish.
I love to get to know YOU.
 I am simply blessed to create~charlotte♡


Saturday, November 14, 2015

Peter Piper Painted Pumpkins, a Peck of Painted Pumpkins... ;) Saturday, November 14, 2015

Do NOT say you CANNOT, instead TRY!

 When I had my make it/take it classes, I had several people who told me that I had a gift to break down steps that helped to make painting simple.
 I took that as a great compliment.

DecoArt is my favorite brand of paints and I have used them for over 20 years. I added Fabric Painting Medium to my regular acrylics.  I am so happy to be a Helping Artist with DecoArt.
 I recently got an order for 36 of these little bitty canvas bags (about 5 inches square) and I thought you might like to see how easy it is to paint a pumpkin on canvas...well, actually, you can paint it on ANYTHING, but if you do, you will probably need to use better brushes.
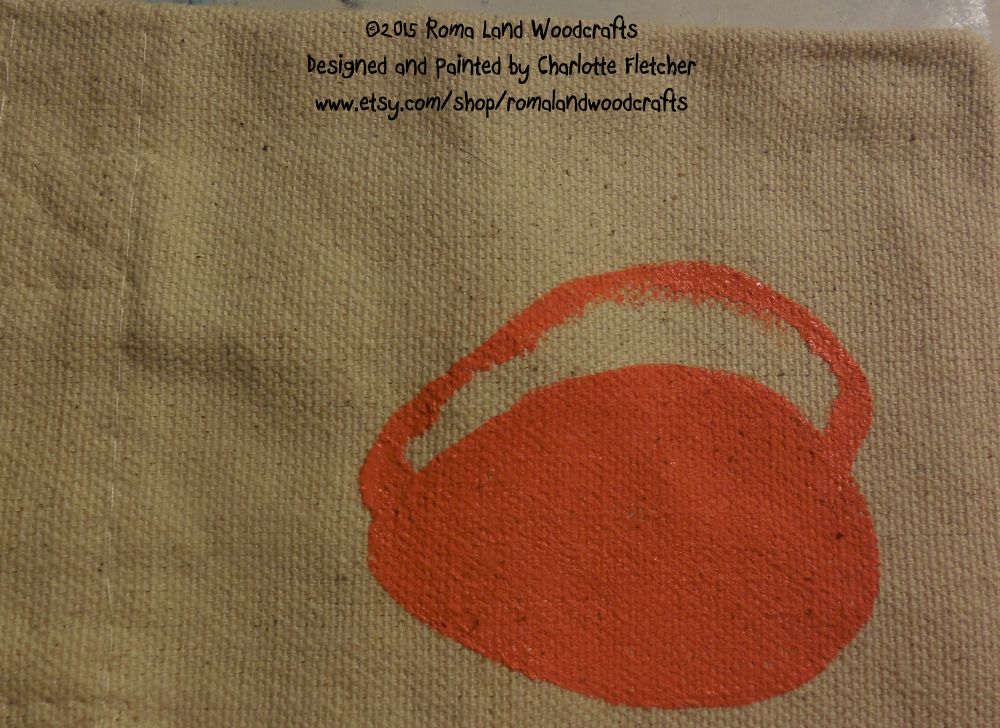
draw an squished circle...and color it in
 Canvas is a rougher surface and I find that those CHEAPO white bristle brushes are perfect for painting on canvas...sure they shed like crazy, but just let it dry and wipe them off~~no biggie.

I turn my surface in all directions when I paint...draw the right "hump" onto the center "hump" and color it in
 I was out of those cheapo brushes, so I just used what I had...something we should all learn! (preaching to the choir, huh?)


Draw a left "hump" onto the center hump and color it in...that is the shape of your pumpkin!

IF you absolutely do not wish to paint, you can create these using your favorite medium of choice~~these would look GREAT made with bling~~draw on the pumpkin and glue the rhinestones/sequins/glitter on...

With the same brush you were using, draw the corner through the brown paint
 Or you could use fusing material (yep...it has a name~~no clue at the moment WHAT it is!) and add fabric pumpkins...again, you can outline them with bling...

I showed how to shade each section, but if you wish, you can go around the outside edges and then add the two center lines

Do I seem to be stuck on BLING???  
Hey, a girl can NEVER have too much bling...or can she??

with the edge of your brush that has the brown paint on it, shade the outline of the pumpkin...this is just exactly like taking a pencil/marker and drawing around something, only you are doing it with a brush.
 If you stitch, then stitch on a pumpkin...or use whatever YOUR FAVORITE craft is...just USE your talent.
add some lines to add some dimension to the painting...you don't have to do this, but I think it adds a lot for such a simple step.
I think these would make awesome gifts for your upcoming Thanksgiving Holiday...or make them with Christmas designs (by ALL means, do NOT leave them simply painted RED...I don't think my soul could stand the stampede of HATERS...)
using a liner to add the stem and the fancy smansy line, which is easy to do if you go slowly!
 SO, I have all these bags, what do I do with them? 
Pulling your work TOWARD you is so much easier, so again, upside down the pumpkin goes as I add the line work,  The stem is simply the dark chocolate.
 WELL, you can fill them with pip berries, as I have~~hang them on a doorknob, the spindle of a chair to help decorate the table area...hang them on a peg or the knob of a side table/dresser...

Add Honey Brown to the stem to add a highlight
 OR fill them with: Candy, a candle, supplies to make one of these, a piece of  jewelery, supplies for a cheeseball or your favorite spice mix...really, any small gift can fit in these and if you wish, personalize them~~EVEN ADULTS love to get personalized gifts!!
With an old scruffy brush, load some Marigold on the bristles, but wipe almost ALL of the color off...then scrub this in the middle of each section as a highlight.
 In each of the pictures throughout this post, I have shown you step by step how to paint a pumpkin...it really is that easy!


 The pumpkins are painted wet on wet...meaning the paint is wet when you do the next step and this helps to blend the colors together and makes them very fast to paint....but be very careful not to get your hand in it and smear it...but if you do, take a clean cloth and wipe off the mess and continue...

DONE!!
You don't have to worry about the shape of your pumpkin because they come in all shapes and sizes!!

Have fun creating...Get family and/or friends to have a craft night or day...it builds friendships and gives you LOTS of laughs...

Do not worry about not being a pro...the only way I know to get better at something is to keep practicing, unless, well, you are a GENIUS and able to create on demand, and in that case, you are one lucky dog!!


Embrace the creativity in YOU...Share what you love to do...and ALWAYS pay kindness forward....Blessings to YOU...~charlotte


Sunday, December 21, 2014

On the ELEVENTH Day of Christmas, Sunday, December 21, 2014

I shared on my Facebook Page today that we don't usually have a White Christmas in Middle Tennessee.  The last one on record was in 1974, but we have had snow on Christmas, just not much!  I laugh because it seems that no matter HOW WARM it is on Christmas Day, the weathermen always put a 30% chance of mixed precipitation...This year is NO different...it is to be 43 and yes, we have a 30% Chance of mixed precipitation...not sure WHAT it will be mixed WITH...


The only kind of snowmen we get are ones we paint, so I decided to show you how to paint a snowman that is VERY quick and Easy...I did the frame and painting in about 30 minutes.  If you are not used to painting, you still should easily be able to do it within one hour.

Burlap is so popular, that I had bought these burlap boards...turns out they are NOT easy to paint on, so this project is perfect.  I used a frame that I had gotten at the thrift store for a couple of bucks, so all in all, this is a CHEAP project also.

I used those CHEAP brushes that you get in CHEAP packets...some call them chip brushes...they will probably shed as you paint, but no worries, when it dries, brush them off.  You will need one fairly decent liner, but if you get one of those cheap packets of brushes for about $5, then there is one in there that will do.  I have gotten some pretty good basecoating brushes out of those cheap packages, so you just never know!

Gather your supplies: I use DecoArt Americana Paints because they are WONDERFUL quality.
 Frame
Burlap Board (or wood or canvas)
candle, optional
Larger flat Brush
2 chip brushes
1 liner Brush
White Paint (I used Warm White)
Orange Paint (I used Canyon Orange)
Brown Paint (I used Milk Chocolate)
Red Paint (I used Santa Red)
Black Paint  (I used Lamp Black)
Treasures Chalky Finish Paint (you can use whatever color you wish for the frame)

A Note before we start:
I used the Chalky Finish Paint in Treasure, which is a Turquoise-type color.  You do NOT have to used Chalky Finish Paint, but I love how easily it sands off and the matte finish it leaves.  Also, I often use BLUE to Shade my snowmen, but you could EASILY use another color such as Brown or Black...There are NO rules...Painting should be a reflection of WHAT YOU LIKE!!


If you choose, place wax  randomly around the frame before you paint it.  This will allow the paint to sand off easily in spots.  Paint with the Treasure Chalky Finish paint.  Set Aside to dry.


This is what the burlap board looks like.  It is 8 x 10.


This is the chip brush that I used.  AS you can see, it is a size four...not too big, not too little...JUST RIGHT!


Load the brush with White and draw your outline...The head is basically a half circle...IF you don't feel comfortable free handing this, then use a plate...a dessert plate would probably be about the right size....Go ahead and do the outline for the nose too...come on...you can do it!!


Paint the nose white.  It will take quite a bit of paint.

 
 Paint the head next.  I just poured a blob of paint on the head and brushed it in because it takes quite a bit of paint...now don't go CRAZY with how much paint you squeeze out...about a quarter size at a time is enough.


Load a VERY SMALL amount of the Treasure on your brush and add it to the edge of the snowman's head and around the nose.  When you have finished this, wipe off as much of the Treasure as you can on a rag and then add more WHITE to the brush and go back over it to blend the blue into the white...


With the same brush, Paint the nose Orange.  I have it turned upside down to paint the bottom side.  I added JUST a tiny bit of Brown to ONE EDGE of the brush and placed THAT EDGE on the edge of the nose and painted around the entire nose...this is called shading.  It does NOT take much paint at all.


I wiped as much paint off of my brush with an old rag as I could and then loaded a TINY bit of Red.  THEN I wiped as much as I could off THAT paint off and then lightly painted in my cheek.


I switched to a little better brush that the bristles didn't flare out so much to paint the eyes and mouth with Black.  If you are new to painting, you might want to use a round brush to do this...it REALLY is easier with a better brush, but this ole gal is tough and liked the challenge...BWAH!!  After I painted the eyes and the mouth, I used my hair dryer to dry the paint because you don't want your eyes to turn GREY when you add the white.


I switched to my liner brush to add the eye details with White.  You will notice that I place a line of the LEFT side of each eye and then just made a CROSS and then an X on top of the cross, and a DOT to the center where the lines intersect...in other words, I made a SNOWFLAKE for the eyes!  I then added a white line to the top of the mouth and 3 dots to the top of the cheek.  I added the snowflakes as described for the eyes to the empty place on the canvas and then just some random dots and NO, mine were NOT round...it doesn't matter!!


The last thing I did was to add JUST a touch of the Treasure under the mouth and on the outside RIGHT side of the eyes...do NOT get this dark...I used a DRY chip brush to do this...


The frame has dried while you we were painting our snowman, so to finish, I just sanded over the paint to remove some of the paint to make it look primitive and wiped it off, place the canvas in the frame and THAT is IT!!  What an EASY and GREAT gift to give to a friend!!  

It may not SNOW at my house, but really, this is the BEST snowman EVER because I was able to paint it in a WARM, DRY home!!

I wish Blessings to YOU today...~charlotte♥