About Me

My photo
I LOVE to design and to paint whimsical items that will put a smile on your face. Each day I share my simple life with you as I try to encourage, to inspire and sometimes JUST to make you smile as I recount my life growing up on a dairy farm! I've never had many material items in my life, BUT I have been blessed beyond words with love and encouragement from WONDERFUL Parents who instilled in me WHAT was important. I have had EVERYTHING that I needed and WAY too much of what I wanted. I am slowly learning to be a better person each day through my interactions with my friends on Facebook. Some day I hope to be as good as people seem to THINK I am! I am BLESSED! Welcome to my little corner of the world...Please stop by and visit often!
Showing posts with label Free project. Show all posts

Sunday, May 6, 2018

Celebrate YOU


Time is sure marching on!

I have a long list of "to do's", 
like most of y'all do, 
But 
I am pretty pleased with what I have accomplished this year.

I am not going to 
beat up on myself; instead, 
I am going to pat myself 
on the back.

We don't do that enough.
We remind others to BE KIND, 
While we point out each flaw 
we see in ourselves.

This world is filled with hurt.
People are screaming 
at each other, 
with few of us listening. 

Fingers are pointing all around, 
instead of us looking 
within ourselves to see 
how we are contributing to
 the problem.

We fuel pettiness with our posts...
divisions with our tunnel vision...

Where and when does it end...

When will we decide to 
be part of the solution?

I am at a crossroads,  
again, taking 
inventory of my life.

I have much work to do on me, but TODAY, I am going to be kind to myself, and find some qualities that I am proud to posess.

I won't bore you with them.

I am not everybody's 
cup of tea, 
and I am fine with that
AND
Not everybody is 
my can of Coke--
I changed that cause
 I do not like tea.
😁😂🤣😎😍

Today, I am going to 
CELEBRATE LIFE
And love on me.

I hope you will do that
 for yourself, too.

When we love ourselves, 
We can pass it on.

So, I am throwing on
my SASSY PANTS
and struting my stuff...

Who am I kidding...

I am going to sleep...

Nite nite!😁😂🤣

I am simply blessed
 to create~~charlotte♡

Here is a weedle something to keep you out of trouble as I sleep.

Click here to download the file for Good Morning Froggie


Saturday, April 14, 2018

Be Still..


Hey, y'all.

I hope you have had a happy week.

I have been ticking things off of my
TO DO list, and I am happy
with what I have done.

Sometimes, we need to remember to be kind to ourselves, and rejoice in what we get done, and just offer grace to ourselves for what we didn't do.


I had to make a run to town, this week,  and boy, where is everyone going in such a hurry?

At the grocery store, a man came swerving around the parking lot like an Indy car driver. Going home, I had to slam on my breaks to avoid a man hitting me head-on while he was passing another car, and the SUV behind me was so close on my bumper, I prayed for safety.

I admit, that I understand road rage, well, to a certain extent, and I remember always running to meet a deadline, but I tried to be safe and never put anyone's
 Life in danger...I tried to think of others.

When Daddy was so sick,
it was a lesson for me
to slow down.

I pushed him many places in a wheelchair, while he gained back his strength, and marveled at the rudeness
 Of so many people running to get in front of us, lest they have to slow down.

While I rejoiced when he was driving, again, oh, how I prayed for those behind him, but I also recognized that he had just as much of a right to be on that highway, as everybody else!
He paid his dues by living a good, honorable Life.

I was forced to slow down, and I am grateful for that lesson.

I often wish for others to experience a lesson in compassion, so they, too, can be better people.


We all need to stop, and listen.

In the silence,
we can pray to be
 bound to the heart of God.

When we wander, often the gifts of the Spirit disappear, too.
Our focus changes, and we lose our compassion, and kindness.


It takes work to live peacefully with others whose values are different, but we have much to learn from each other.

Thank y'all, for what you teach me.


You are my sunshine!

I am simply blessed
to create ~charlotte♡

Sunday, April 8, 2018

A Friend is a Special Blessing


I shared this picture on my social media accounts and someone asked for the pattern...so, here it is! 

Click here to get the pdf...Enjoy

I will leave this here until 5/30/18
Ok...so maybe a bit longer...lol

I hope this will put some
 SPRING in your life.

I am, sitting here, cold, from
our cold weather.

It is nothing new to have cold weather in the Spring, but to see Snowflakes!

🤤😁😂🤣😃

I am most thankful for a
warm heater, and being able
to sit next to my warm puppy.

This cold weather day
is simply another day
that I have been gifted.
It just happens to fall
in the season of Spring,
and doesn't meet
our expectations of what
we envision a
Spring day to be.

You know what--
I Don't always live up
 to what I claim to be.

I am grateful for this day.
I have ways to get warm.
No biggie.

I find myself shaking my head
over what irritates us.

I get tired of stuff, too
BUT good grief,
why do we complain so?

(She types with a complaining question...😉😊😁)

What will it take to share our JOYS?

Today, our area of Middle Tennessee  mourns the murder of a 5 year old, non-verbal, autistic little boy, committed by his father.

For 3 days, people came from near and far to help search.

I can't understand such evil, but then, I Don't think we are supposed to understand, because, most of us are built to love and to nurture.

What  are YOU are putting out
 in this world.

What are you contributing?

What are you posting?

What are little eyes seeing in you?

For the life of me, I Don't understand how we grumble so much, when we are so blessed!

Today, I offer you an
Act of Kindness and ask,
only, that you
pay it forward in some way.

The purpose of my art is to
make you smile.

I hope I have done that.

Let's share our joys.

Let's pray for others.

Let's meet the expectations of a loving, caring, kind, compassionate person.

Celebrate life and all that is good!

I am simply blessed
to create~charlotte♡


Sunday, April 1, 2018

Easter


Happy Easter!

16 For God so loved the world, that he gave his only begotten Son, that whosoever believeth in him should not perish, but have everlasting life.

17 For God sent not his Son into the world to condemn the world; but that the world through him might be saved.

May you live the message of Easter and of Christmas in your life, each day.

We serve a living Savior, who is very much in the world, today.


God does NOT cause our problems, nor does He lead us to problems to teach us.

God does allow us to reap what we sow, because we have been given free will.

We make bad decisions, but NEVER does God tempt us with evil.

We are given mercy, and grace by a loving Father, who more often, than not, gives us far better than we deserve.

We MUST extend this grace to others, and, yes, to ourselves.

The blood of Christ made us worthy.

Eternal life is offered to everyone.

Please ask Christ to live in your heart --to make you a new creation.

Yes, you will still make mistakes, and this doesn't exempt you from the troubles of the world, but living for Christ offers you better decisions when following His words of truth.

Easter marks a new commandment to love as He (Christ) loved you.

Let's truly love each other.

May our lives reflect the eyes, ears, hands, feet, and heart of God.

I pray to help with the harvest~~That I will be willing to go where He sends me, and to follow His plan for my life.

I pray the path will be plainly laid in front of me.

I ask forgiveness for my sins and short comings and for the times I was harsh and unkind, and responded with anger.

I ask that my life will be a better reflection of my many blessings.
I am simply blessed to create~charlotte♡


Thursday, June 9, 2016

Tutorial Thursday


You all will be happy to know that I am feeding the mosquitoes very well…heavy sigh…


I have spent over an hour going to every spot in the back yard and in the living room looking for a place to get a good picture…good grief!  Some days it is so easy, and then there are those days that all you do is struggle…today has been the struggle, but it is ok.  I learn by doing, and I should be brilliant by now, but sadly~~not so much!  teehheheeee


Karalee was looking for the pattern I am sharing today, and I told her that I would be more than happy to share how I made this.


OF COURSE, I used my favorite DecoArt Products. 


Honestly, that is all I use if they are available.  I cleaned out every other brand and gave them to Goodwill.  I hope some person was able to grab them and use them to create…


SO, I gathered:

Americana Decou-page Satin

Americana Acrylics:  Black, Foliage Green, Avocado, Raw Sienna, and White

Scissors

Very Old Hymnal—I always make copies.  I just can’t make myself use real music.

A brush---about ½ or #12

A good liner brush.

Magnet or Wire—I made these into magnets

Word Processing Program~~Brandly Hand, or font of your choice.  The font size I used was 36.

Tracing Paper


A friend had asked me to make something using this song to give to her Sunday School Class for Christmas of 2014.  After Several tries, this is what we agreed to do.  I love how it turned out!


I purchase the wood in packages of 6 from Joann’s.  This is the only place I have ever found these.


Paint the wood with two coats of Foliage Green.


Take the piece of music and fold it in half (the half mark should be above the word TUNE).  Do not make a heavy crease, just hold it in half.  Cut in the shape of a heart.


Apply one coat of Decou-page to the wooden surface and place the heart as you want it to be.  I applied mine to be off-center.  Apply another coat of Decou-page on top of the heart, getting out as many air bubbles as you can.  I didn’t have problems with air bubbles on this project.


Clean your brush with soap and water.


Allow the piece to dry.  Of course, impatient me, used a hair dryer to speed things along!


I drug the corner of my brush through Raw Sienna and applied it to inside of the heart.  When I finished, I wiped my brush on the green part of the wood to “clean out my brush”.


I then drug the corner through Avocado and applied this to the outside of the heart and around the edges.  Again, I wiped my brush on the green part of the wood to “clean out my brush”.


I applied a little bit of White in a few spots, but not much.


After I finished, I decided the heart was too light, so I thinned Raw Sienna and painted it over the heart to “antique” it.


I traced the writing onto the piece and outlined it with thinned Lamp Black.


When all was completely dry, I painted over the entire piece with one more coat of Decou-page to seal the piece…


That is it!!  Put a magnet on the back and give it away to someone special!


I love these simple projects and hope you will, too!  Let me see if you create something using this idea!!


Every once in a while, we all need a fine tuning! 
When my heart starts to wander, I am thankful that I need only ASK to have God bind it to His heart, so that I can focus on the things that matter...


I am simply blessed to create…~charlotte♡


Saturday, June 20, 2015

Sam...Saturday, June 20, 2015

 I thought it was time to share another FREE project using DecoArt Chalky Finish...OK, I cheated and used Americana Raw Umber because I was too lazy to dig into the bottom box to get out the brown...lol  BUT, this shows you how you can easily use Americana Paint with the Chalky Finish Paints...

I wanted this to be a PRIMITIVE piece, since I was making it to sell on my Etsy's Primitive and Folkart Team (FAAP)...We are having an AUCTION today on our Page on Facebook...go join us...The sale ENDS on Sunday, June 21,2015 at 5 pm Central Time.... 
FAAP AUCTION AND SELLING PAGE (click here to go there)


I started by adding a coat of CARBON (Black)...notice that I put tape where the hat brim will go...I also left the back of the hat brim unpainted on the back so I could wood glue them together...Glue will not HOLD pieces that are not glued raw wood on raw wood!

 I taped off the two stripes to leave the stripe that would 
be painted LACE (White)
At this point, I took an old white stick candle and put wax 
where I wanted the paint to peel.
I added the wax heavier on the edges and I avoided the area that would be the face...that is just MY preference...


 I painted the center stripe and the bottom half with LACE (a white).  I used 2 coats to get a better coverage...I KNOW, it is going to be sanded, but I think it looks better to have a good foundation.

 I removed the tape and put it on the INSIDE of the white stripes to paint the 2 red stripes...
on the sides, I painted the red down to where 
the hat brim would go...
I used 2 coats of ROUGE (RED) to paint this.


I wanted a darker blue, so I added some 
CARBON (Black) to LEGACY (Blue)
This is ready to SAND...I use my hand sander...WHOOSH.....

 Perfectly Prim!
 I drew on the features with a pencil so you could see...
I used a wooden plug for the nose.
 I made the fleshtone by mixing
 LACE (white) with Smitten (Peach)...
I showed the scruffy brush that I used to add 
ROUGE (RED) to the cheeks and nose...
use VERY little paint...this is where people can make a BIG mistake...wipe almost all of the paint out of the brush for this step!
I added the mouth with CARBON (Black) and
the lips with Rouge (Red)
 I added the eyes with Carbon (Black) and 
shaded the face/moustache with RAW UMBER.  
I added highlights and the lettering with LACE (white)...
I went around the piece with my Raw Umber to give it more of an antiqued look...you could antique this if you want...
I will add 3 coats of DuraClear Ultra Matte and
 put a hanger on the back...That will be IT!!

You can EASILY paint this project 
with regular Americana Acrylics, 
but I LOVE to use the Chalky Finish Paints!!


See their AMAZING products AND
look at all the FREE patterns they offer to use these products!
 
Below, is the pattern...to save it to your computer, Right Click on the picture and choose SAVE AS...your computer might say something different, but there should be an option to save!

You are MORE than welcome to make these to sell, but PLEASE do NOT claim the pattern/instructions as your own...give me credit...Do not mass market this pattern/item...feel free to resize as you need and enjoy this quick and easy project...feel free to add YOUR STYLE to this...

I hope you have FUN with this...As you are painting, remember those who have gone before us to keep us free...LIVE your life THANKFULLY...Treat others as YOU WANT to be treated, and it is NOT your problem if they choose not to return the kindness...hang in there because KINDNESS does MATTER!!  I wish GLORIOUS...BLESSINGS to YOU...~charlotte


Thursday, January 15, 2015

In the Meadow We CAN build a Snowman...Thursday, January 15, 2015


I have always been one of THOSE PEOPLE who doesn't mind helping someone else develop their skills and I am pretty good about sharing HOW to do things...NOW, don't get me wrong, IF someone is trying to destroy my business or taking my ideas and claiming them as their own or are not willing to put in the time to learn, that is different, but MOST people are not that selfish, or at least I CHOOSE to believe they are not.

I was once told that I was a good painting teacher because I have a way to BREAK DOWN the end product into simple steps.  I was flattered.  I BELIEVE that WHEN someone wants to learn something, then they can...MAYBE they won't be AS GOOD as some, but they WILL be better than others!  I ALSO BELIEVE that we have to PRACTICE if we want to get better...learn new techniques, try new color combinations, try new styles...it is just part of growing.

I've had a few discussions lately with my designing friends about patterns...Doing a pattern WELL is different from doing a PATTERN...

I had to re-do a snowman for an OUTSIDE project I had done a few years ago, so I thought I would show how EASY it can be to come up with a project that you can SUCCESSFULLY complete.

I used Outdoor Grade Plywood...this is about 1/4 inch...BE CAREFUL about the thickness you are choosing because plywood tends to warp...IF it is going to be FLAT against something, that isn't too big of a deal, but this LITTLE snowman...he's about 20 inches wide and 23 inches tall...WARPED as soon as he was cut out!  grrrrr...but after getting him painted, he seems to have flattened out again.

You can purchase various sizes of plywood at the box stores, BUT if you need it, they will give you 2 free cuts to get it to a more manageable size...it is more expensive to buy the smaller pieces, but sometimes it is worth the money not to have to find a place to store the extra wood.  I started with a piece of plywood that was 2 feet square.

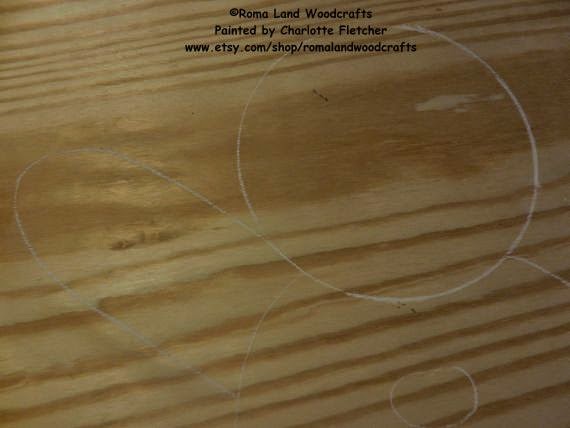
I grabbed a plate and a piece of chalk to draw the head...I would say that I left about 7 inches from the top and about 4 inches from the right side since I KNEW his left arm would be waving and take more room.  

Chalk is a WONDERFUL way to draw patterns because you can just use a damp cloth to erase the lines if you don't like them!


I added the body...just thought about a ROUND circle and added the arm....


I drew the TOP part of his hat next and then added the type of  hat brim that I wanted...NO, it doesn't have to be perfect...it is YOUR world and YOU make the rules!!


I am NOT a tool snob...BUY the BEST of what you can afford...do NOT go out and buy EXPENSIVE tools if you are not CERTAIN you will be using them!  It is amazing the things one can do with just a jig saw...When Daddy died, this was ALL I had and I could cut out some pretty awesome things with it...JUST BE careful...keep your fingers away from the blade UNTIL it stops...don't mess with it when it is plugged in!

This is so simple to use...just use it as you use a pair of scissors...follow your lines and do NOT force the blade to turn or it will jump and you WILL get injured...USE YOUR BRAIN!...it is that simple.


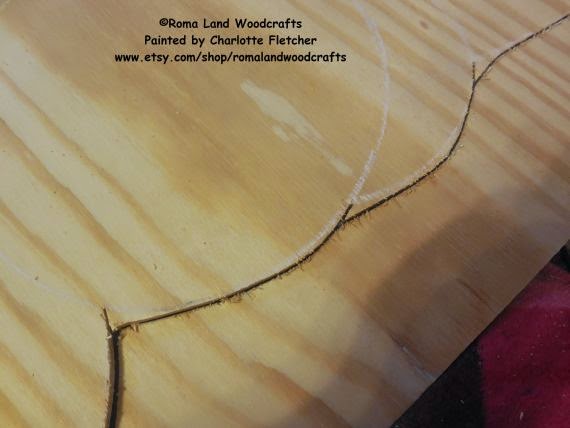
 You can see that I allowed the blade to cut ONLY what was basically a straight line...I could follow the curves and when I got to the point of where the design met, I would back the saw out and continue on in a straight line.  When I got all of the design cut doing this, THEN I came back with my saw going in the OTHER direction from my original cut and did the same thing to get those little nicks cut...it is so simple...just do NOT force your blade to TURN where it won't turn.

Plywood chips easily when you cut it...I chose a SCROLL blade to go into the jigsaw...it has more teeth and therefore, cuts smoother...the less teeth on a blade, the faster it will cut, but it will CHEW up your wood...Since this was something that did NOT need to be of the BEST quality, I didn't mind a few chips here and there...


A SANDER is your BEST FRIEND when cutting wood...it can smooth out the imperfections of cutting and smooth out those nicks... I use a hand sander for most of my sanding....I sand the edges first and then the front, the back and the front again...I wipe the dust off as soon as I finish.


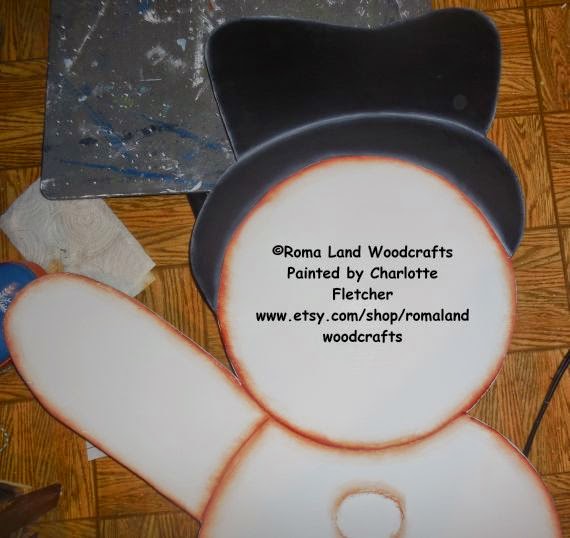
 You can use most any kind of paint that you wish...IF painting something to go outside, you can use house paint, but I just used my beloved DecoArt Americana Paints and will seal it with 3 coats of outdoor varnish...

Since this is a bigger piece, I put a BLOB of white paint directly onto the wood...BE careful IF you do this because you have to work quickly so that it doesn't dry on the piece as you are painting...IF you are new to painting, I would STRONGLY suggest that you pour the paint onto a pallet instead of the wood...you know...DO as I SAY, NOT as I DO...ROFL!!


 I painted the front, the back and then 2 more coats on the front...ALWAYS paint the BACKS of your projects...ugh...


To mark your face, simply use the plate again...


 The hat is painted Black...


I used Traditional Burnt Sienna to FLOAT SHADE the outline of the WHITE Part of the snowman...There is a LOT of debate as to WHAT COLOR to float snowmen...I have seen one lady post REPEATEDLY that ALL snowmen should ALWAYS be floated with BLUE and on and on...OK...she HAS the RIGHT to do that...ME?  I float ANY COLOR I WISH!  I chose a BROWN this time because it is a primitive type design...sometimes I use BLACK...sometimes I use BLUE, but NEVER do I ALWAYS do ANYTHING...ROFL... REMEMBER that PAINTING should be FUN and should be a reflection of YOU and what YOU like!!


 I float shaded the hat with White...OFTEN I will use a GREY, but it doesn't matter...again...YOUR Choice!  Shading is something that I STRONGLY suggest that YOU SPEND time learning to do...there are TONS of videos on You Tube...AGAIN...there are TONS of different ways to do it, also...IF you can't shade yet, you can load a FLAT brush with BLACK and add some White to the corner of your brush and place the WHITE CORNER on the edge of what you are shading...it is a different look, but it is another technique that is good to learn...PRACTICE!!!  Oh, and SOME people to shade will put that color on their FINGER and just drag it along the edge...HEY, do what you gotta do!! 


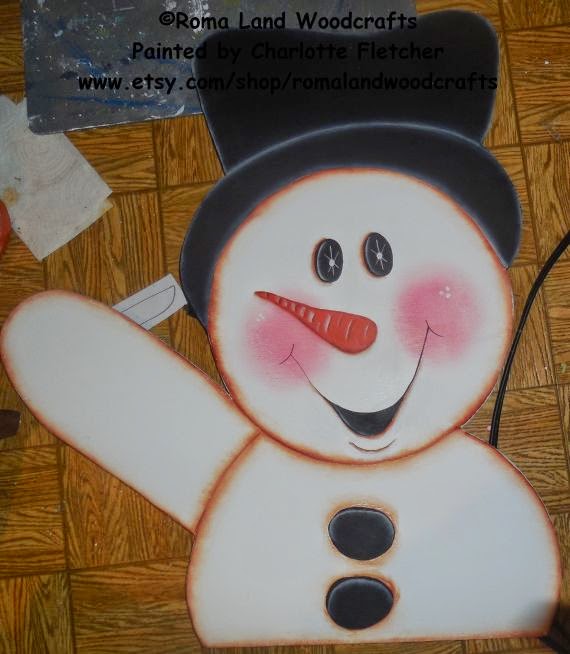
 I used a large stencil brush to add the cheeks...use VERY little paint and a VERY light touch to SWIRL on the cheeks...IF you don't have a stencil brush, then you can use a rag...I just like this look and think that snowmen need big bright cheeks cause they are cold...


 Add the eyes, mouth, and buttons...you REALLY do need a GOOD brush to get GOOD lines...


 To make the nose, I always start with a C and then add the lines to form a CARROT...C is for CARROT...LOL...

I added the details to the eyes and that was it...SO simple!!


I will use wire to attach this snowman to the star...The star we are using was made from old tobacco sticks, but you can find SEVERAL ways to make them on pinterest!

I hope this will inspire you to TRY making something for YOU to use...WHEN you break down large shapes into SMALLER shapes, it really is not difficult...I've had so many people tell me that they CAN'T paint because they can't DRAW a STRAIGHT LINE...WELL, neither can I, but I SURE can use a ruler and VERY SELDOM do I have need of a STRAIGHT Line, so on to the NEXT excuse... ;)

I send you WARM WISHES on this COLD DAY in Middle Tennessee...Blessings to YOU...~charlotte