About Me

My photo
I LOVE to design and to paint whimsical items that will put a smile on your face. Each day I share my simple life with you as I try to encourage, to inspire and sometimes JUST to make you smile as I recount my life growing up on a dairy farm! I've never had many material items in my life, BUT I have been blessed beyond words with love and encouragement from WONDERFUL Parents who instilled in me WHAT was important. I have had EVERYTHING that I needed and WAY too much of what I wanted. I am slowly learning to be a better person each day through my interactions with my friends on Facebook. Some day I hope to be as good as people seem to THINK I am! I am BLESSED! Welcome to my little corner of the world...Please stop by and visit often!

Sunday, April 19, 2015

Porter's Lighthouse, Sunday, April 19, 2015

I never realize how comfortable I am in my own little painting world UNTIL I step out of my NORMAL realm and my friends are all shocked!

I am a self-taught painter and I have painted LOTS of different things trying to find my niche and learning new techniques.

I painted a few years before I learned the technique of floating.  I had grown to love the "dirty brush" method (figures, huh) to get my highlights and shadows.  I am glad that I did that because it taught me about PAINT!

My friend, Lynn, of Painting Thyme Needfuls, was painting a piece by Rebecca Trimble, so I was inspired.

This was the first step...looks just like the finished product, huh?!  LOL
I dug through the 2 books I had and changed my mind about 
10 times as to THE ONE that I wanted to paint....

Next came washes to establish the land and the sea...
 
I FINALLY decided that I would paint a Pattern Packet called, PORTER'S LIGHTHOUSE.
Yes, I went a BIT CRAZY with the clouds, but they are so fun to paint!
 The pattern was for an 11x14 picture, 
but I only had a 12x16 canvas, so that is what I used...
it seemed to fit perfectly...
SOMETIMES I THINK we get hung up on making certain 
we have the EXACT colors and surfaces for a painting...
ME? I do the best I can!!

I did NOT have Spicy Mustard or Autumn Red, so I used my favorite colors of TUSCAN RED and MARIGOLD.
 I am not a great fan of painting STRAIGHT lines...
I paint mostly frogs, daisies, and ladybugs and 
EVERYTHING has a smile on its face...
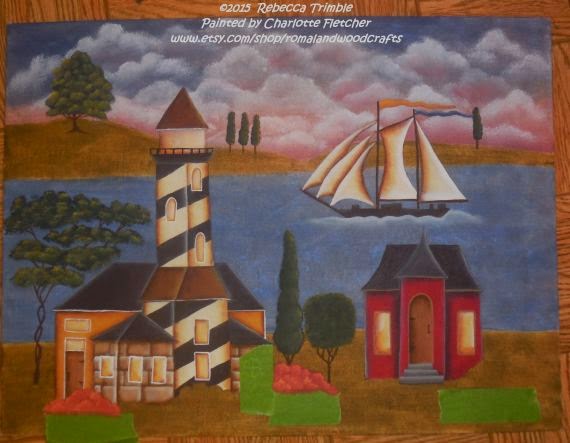
I added tape to paint on the bushes to keep the bottoms straight...
 I LOVED the red house in this design and the colorful bushes
 just added that extra HAPPY COLOR that I love to paint!
I added some shading to PLANT the designs into the ground...
 As painters, we seem to see WHAT we don't like as 
opposed to what we DO like...
WHY is that?
This is the finished design.
As I finished the painting, 
I KNEW that mine looked little 
like the original...
I am CERTAIN my washes were too heavy, but you know what?
I LOVE IT!!
....hmmmmm....as I look at the original, I see that I did not put a shaded line down the middle of the lighthouse...
I can EASILY fix that!...LOL

This is the Original picture from the pattern packet.


As one who designs, my goal is to give a GUIDELINE for someone...I don't want carbon-copies...I WANT people to put THEIR styles into what they paint

If you are interested in purchasing Rebecca's patterns, and WHY would you NOT...
CLICK HERE to go to Rebecca's website.

I can honestly say, that I had FUN stepping out of my 
COMFORT ZONE to paint this beauty!
 * * * * * * * * * * * * * * *
As I said, I got WAY TOO CARRIED AWAY with painting the clouds, but a friend asked me if they were hard to paint...With me being me, of course, I did not follow the directions in the packet...I did them the way I had done them before...
bad me...BAD BAD ME!

GLORY NO!!  They are so easy, so I have included step-by-step picture below to show you in case you want to paint some this way...I have fun finding NEW WAYS to do this and when I got my MOP BRUSHES, this seemed like a good use for them... 

OF COURSE, I used DecoArt Americana PAINTS, as I always do...I THINK they are the best for MY paintings! 

I painted the sky with UNIFORM BLUE AND KHAKI TAN using a slip-slap motion...don't have a solid covering.

When Dry, add a wash of clean water

Add the SHAPE of your Cloud with a deerfoot Brush...you can use an old scruffy brush, also...

Using the MOP brush, gently tap, starting at the bottom and working to the top, softening the color. I didn't like the first one, so I just added some more paint...

This is what it looks like after I MOPPED it...

I added more White paint for another cloud...Only work on 2 or 3 clouds at a time because the paint will dry and you will not get the softened look that is the goal!

This is after they have been mopped...you can add some COLORS in here using the same method, if you wish, OR add a VERY LIGHT WASH of another color to the bottom of the clouds, but that is the method!!

People remind me of painting...SO MANY LAYERS...What you start with is not always what you THINK it will be...we NEED a FOUNDATION to make us STRONG...
Some People are worth peeling back the layers to FIND what makes them WHO they are...

I am THANKFUL for all of my friends who take the time to get to know me...I HOPE that it has been worth the effort...

Here's hoping that you will enjoy this DAY that was created JUST for us and that you will USE the talents you have been gifted...
As always, I WISH...Blessings to YOU...~charlotte
Monday, April 6, 2015

Barbadora's Bunnies...Monday, April 6, 2015

I cut the wood from 3/4 inch Pine...Oh how I am sure it frustrated Daddy to explain that 1 inch wood was NOT one inch...WHY???


FIRST of all, I want to apologize for misspelling Lynn's last name in the pictures...I KNOW better and I am TOO lazy to redo the pictures...sowwy, Lynn, BUT for some reason, I BET I am not the FIRST one to misspell it, says the girl whose first name has been SLAUGHTERED so many times that I have lost count! I don't think my Aunt Polly EVER learned how to spell my name...sigh...I am just NAUGHTY...


NOW on to the FUN PART...

Now, I am feeling guilty since I didn't want to re-edit my pictures BECAUSE I shared with you how GENEROUS Lynn was in sending me a box FULL of goodies!!

In this box were 3 of her patterns and I could NOT wait to get them cut and painted...SO I did!!

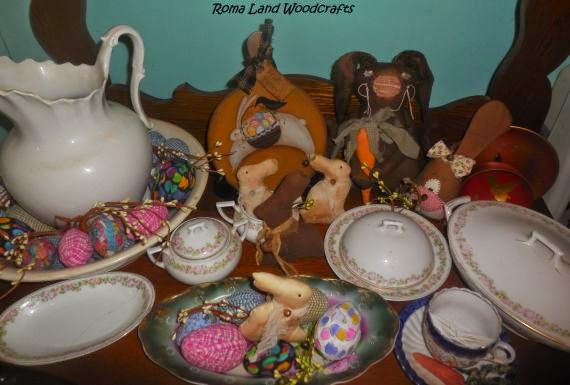
JUST BECAUSE Easter is over, the BUNNY SEASON continues!

This is one of my favorite techniques for making something look Primitive...using candle wax between the layers!

 I am so lucky that I can cut my own wood...It wasn't something that I ever planned to do, because I am TERRIFIED of loud noises...

When I was small, my parents took me and the middle child to be on the BOZO show...I was chosen for a game and IF tapes exist, it would WIN America's Funniest Videos (really...am I the ONLY one who thinks that FEW of those Videos are FUNNY...guess they haven't seen a life lived like mine...)

The game was the one where you tie a balloon on a string around your ankle and try to be the LAST one remaining without their balloon popped...GOSH, there could NOT have been a more nightmarish game for me to be chosen to participate!  I can still remember standing with my fingers in my ears, with LITTLE interest in trying to pop ANYONE's balloon...

I was ALSO afraid that Romper Room would call MY NAME at the end of the show...COULD I have ISSUES for some reason???!!!

Oh, Well...Daddy had always cut my wood for me and when he got sick, I had orders for some hearts and I made an attempt to cut them with the band saw...LORD HAVE MERCY ON MY SOUL...I was a NATURAL at pulling that blade RIGHT off track and I was SO GIFTED with not being able to put it back on...ugh!!!!

When Daddy died, I became very good at using a jigsaw...You would be amazed at the small stuff I could figure out how to cut with that thing!!  BUT, I also faced the reality that I would not be able to do what I had always done, so I thought I would just give up painting...it made me sad, but I was sad anyway...

The Christmas after Daddy died, Mother gave me some money and I really didn't KNOW what I was going to buy with it.  I had gone into Lowe's and was looking for something, SO I just wandered over to the power tools, a habit from being a Daddy's girl and I found a scroll saw that was one sale for an AMAZING price...the AMOUNT Mother gave me would COVER it.  I found a man who worked with tools and at the store asked him several questions and he was so kind and helpful.  I decided that I WOULD take it and he went to find one ONLY to discover they had no more, SO I asked IF he would sell the display at a DISCOUNT to me...He found the manager and I went home with a NEW Scroll Saw!!  It took a little bit for me to get up the nerve to try it, but slowly, with time, I learned how to use it and I am SO THANKFUL...I STILL use the CUT and PRAY method because when that blade breaks, I LAUGH at ME for being afraid (another possible video moment)


Isn't this the most lovely scene?  It has most of MY favorite things all in this one little painting!
 Sometimes we NEED to be pushed out of our comfort zones to FIND what we are CAPABLE of doing...NO, we don't like it, but OFTEN we surprise ourselves!

I LOVE that the tag was painted onto the design instead of being added...I used some antique buttons to add to the penny's
 I am SO THANKFUL for the people that have been placed into my life.  I have learned so much from being in their circle of friendship...NO, I will PROBABLY never meet most of them, but they are TRUE Friends!

I have learned techniques and have embraced the different style of painting that exist!  Very few days pass that I am not in awe of the talent of my friends...


I SURE HOPE they all know that I appreciate them...


This is the finished SPRING THYME IS HARE....
Click HERE to buy this pattern as an INSTANT DOWNLOAD.

Click HERE to go to Lynn's Etsy shop for ALL of her patterns
OR 
Click HERE to go visit Lynn's Blog...it is one of the BEST that I have seen!


This is a BIG BOY!!  I painted him with 
Chalky Finish Paint by DecoArt (of course)

Click HERE to purchase the PATTERN for Sir Hopsalot!!  He is so easy and FUN!!


The PATTERN for Mr. Bobtail can be purchased by clicking HERE

Thank you, LYNN...I HOPE you know how special these gifts were to me and how they helped to INSPIRE me to be creative...

ALWAYS take time to do SOMETHING that YOU LOVE...We have been given our gifts for a REASON...GOD KNEW the importance of resting and being refreshed...He did NOT create us to work around the clock...

Thank YOU for stopping by my little corner of the world...YOU are LOVED and appreciated and I am THANKFUL that you took just a few minutes to spend with silly ole me...
...Blessings to YOU...~charlotte

Friday, April 3, 2015

TAG, You're IT! Friday, April 3, 2015


Tags are SO Popular in the Art World today and they are not used ONLY in the painting field, but with sewing...they are included in ALL styles of painting~~whimsical, traditional, primitive...

I have been playing with tags this week.  I PRIMED some...

I took boiling water and added instant coffee, Vanilla Flavoring and Powdered Cinnamon.
I dipped the whole tag in the mixture and then laid it on a cookie sheet to dry...
If you get impatient, simply use your hairdryer or place them in a 200 degree oven...keep an eye on them so they won't burn!
I left mine CURLED, but if you want them to lay flat, simply iron them between cloth.

IF you can't find the size tags you want, then cut them from Card stock.  Make the whole with a hole punch and IF you wish, put a round reinforcement ring around the hole, but don't worry if you don't have any...

'

 Sometime we get so worried about buying the PERFECT gift, but sometimes, simple is BETTER!

IF YOU KNOW that somebody has a favorite candy, then paint a paper mache box and load it with the treat and add a tag...


Give a bag of those Rag Eggs I showed you how to make, 
add some pip berries, 
and put them in a bag WITH A TAG...


 Buy a favorite scent of candle, and PUT a TAG on it!!


 Those Orange Cookies I shared with you yesterday 
make WONDERFUL gifts...
Put them in a BAG... and TAG!!


 Put some Holiday Candy in a jar and TAG them 
to the One you Love!


CHOCOLATE can't be WRONG, SO TAG it to YOURSELF???  LOL...

Each of these tags took about 5 minutes to paint...
don't make them difficult...
just have FUN...

ENJOY giving small gifts that you took the time to create...
but by all means, CHERISH the TIME you spend 
with the one you give them to!!

...Blessings to YOU...~charlotte


Thursday, April 2, 2015

Time to make the cookies...Thursday, April 2, 2015


As you can see, we have had this recipe for a LONG time...Gosh, I don't think you can even BUY a 1 lb box of Vanilla Waffers anymore...I had to buy 2 boxes...my cousin gave it to Mother and it has become one of my FAVORITE Easter Treats...


I am not really sure why I THINK this is an Easter cookie, but I just do...It is like the daughter that was helping her Mother in the Kitchen to prepare the ham.  The Mother took the BIG knife and cut about 2 inches off of the end of the ham before she put it in the pan to cook.  The daughter asked the mother WHY she did that.  The Mother looked baffled and simply said it was the way HER Mother did it.

When the family gathered for their holiday meal, the granddaughter went and asked her grandmother WHY she always cut 2 inches off of the end of the ham to cook it.  The Grandmother got the SAME baffled look on her face, when all of a sudden she said, "The ham was TOO BIG for the pan, so I had to cut it off so it would fit."


Many of our traditions happen simply BECAUSE we liked something, so we kept doing it UNTIL it became expected...


I am certain there is a TREAT that YOU like that you usually only get or make at a certain time of year and the ANTICIPATION is so worth the wait!


Just a note...I don't really care for coconut, so 
I ROLL my cookies in confections sugar!  YUMMY!!

My cookies are made and Charcoal gave his PAW of approval...I think I will be freezing most of these so I won't be tempted to eat them all in one day!

I HOPE that you are looking forward to a tradition.  Remember to SLOW DOWN and enjoy the PEOPLE that surround you, because once they are gone, it gets very lonely...Blessings to YOU...~charlotte

Hey Roamie...I hope you are having fun with Momma and Daddy...it is hard to believe that you have been gone one year...I miss you and will always remember that YOU were the best puppy ever...You SURE would have loved these cookies, just like you loved sitting under my feet WAITING for one to drop so you could gobble it up...xoxoxo

Wednesday, April 1, 2015

Get EGGcited for Easter! Wednesday, April 1, 2015


One of my MOST favorite things about Easter, is hiding eggs!  I LOVE to watch the children running and gathering the eggs...I LOVE those who hunt with the buddy system, or the ones who are so focused on finding the golden egg, or those who methodically browse the area to find ALL the eggs that those in a hurry skipped over in trying to find ONLY the easy ones...It reminds me of life and the different personalities that we come across...BUT most of all, I LOVE the JOY of the event!

 When I moved to Arkansas as the Christian Education/Music director, we were discussing the egg hunt and what we had to do...I was AMAZED at how in the world anyone could STRIP an event of so much fun...They used real eggs (YUCK)...and the refreshments were popcorn and lemonade BECAUSE there was NO SUGAR and NO COLORING so that the children would not be EXCITED...ugh...YEP...We SURE didn't want CHILDREN to be HAPPY at CHURCH...

I KNOW this is amazing, BUT never do I remember dying eggs for Easter...It could be that because I didn't like eggs, Mother knew it would not be something that I would enjoy, but then, MAYBE we did and I just don't remember it!

I am NOT an egg eater...IF I don't taste them, then there is no problem, but the moment I taste one, that is it!

We all have grown weary of my telling you HOW MUCH I was a Daddy's girl, but you just have to get used to that, because I WAS...If my Daddy ate it, then I would eat it UNTIL I just could not stand it...

I can remember a particular moment as well as I can see the fingers on my hand.  I was probably about 3ish...Each morning we would gather around the table and Daddy most always ate the same thing~~2 pieces of toast with Karo Syrup (the clear kind), 2 eggs, 2 pieces of bacon or sausage and coffee.  Each day he would cut the toast into 9 pieces, and then mash his eggs-over-easy with his fork~~that could be the beginning of my NOT eating eggs~~YUCK!!!

I LONGED to have MY toast cut JUST LIKE DADDY's, so I asked him to cut it, so he did...THE PROBLEM was, he had EGG on his fork and he got it on my toast!  I can remember sitting and watching that yucky yellow merging with my pretty tan toast covered in syrup and I was HORRIFIED...I said: YOU GOT EGG ON MY TOAST...I was told to EAT it anyway...I THEN started a crying fit saying that I could NOT eat it...It was NOT a very happy meal for anyone that day...and I assure you that I did NOT eat that toast!!


This kind of egg is more MY STYLE...This would be a FUN project for the kids to help with...
they would LOVE to shred the cloth!!


Simply tear strips of cloth about 1 inch wide and hot glue the end and just wrap around the egg until it is covered...I added a drop of glue at both ends of the egg when I started so it wouldn't slide off.


If you wish to HANG the eggs, be sure to put your 
wire in the egg BEFORE you wrap it...


When you have it wrapped, secure the end with another drop of hot glue.  Brush on Decou-Page and let it dry...You can also use Mod Podge, school glue or fabric stiffner.  Simply lay it on a styrofoam plate or wax paper to dry...

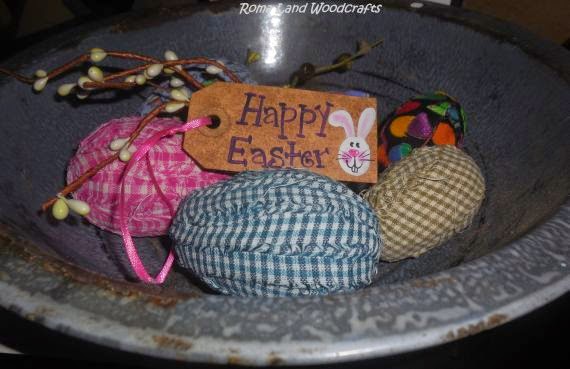
Place in a bowl with a tag and pip berries and you have a FESTIVE Easter Decoration...

Put some in a bag for a hostess gift...


Wishing you the JOY of Children hunting for Easter Eggs...Blessings to YOU...~charlotte