About Me

My photo
I LOVE to design and to paint whimsical items that will put a smile on your face. Each day I share my simple life with you as I try to encourage, to inspire and sometimes JUST to make you smile as I recount my life growing up on a dairy farm! I've never had many material items in my life, BUT I have been blessed beyond words with love and encouragement from WONDERFUL Parents who instilled in me WHAT was important. I have had EVERYTHING that I needed and WAY too much of what I wanted. I am slowly learning to be a better person each day through my interactions with my friends on Facebook. Some day I hope to be as good as people seem to THINK I am! I am BLESSED! Welcome to my little corner of the world...Please stop by and visit often!

Friday, September 30, 2016

Tutorial Thursday: Pewter Metallic

I have been playing with some more of my DecoArt Goodies...

This time I have fallen in love with the 
Americana Decor Metallics in Pewter.

This color is amazing.

I don't have an Americana Color to reference, 
because there is nothing like this,
But I got a similar color by mixing Neutral Grey with Deep Midnight Blue.

I made another little pumpkin from plywood to play with this color.
The pumpkin is about 6 inches tall and 7 inches wide.

Pewter Metallic was placed on the top and bottom pieces 
and I mixed the 
Deep Midnight Blue and Neutral Grey 
to get the middle color, 
Then I added the Chalky Finish Medium to this mix 
to make sure it was FLAT!

You have to keep a bottle of this Medium on hand for those times 
when you want to make your own Chalky Finish Paint!  
What a great addition to my painting stash. 

Also, on this piece, I wanted to try the Ultra-fine Tip to see if I could control it and if I could use it to write a word.

Yes, I can. 
This was my first attempt, 
with no practice, other than giving it a try on my pallet.
I'm not going to lie--it was very shaky because I was being timid, BUT I was able to use the tip to go over the writing again, and it looks great for a first time effort.

I used it to draw an outline around the pumpkin.

I cannot wait to use the tip again, this time with Lamp Black.


The next test was to make a simple sign.
I added 3 coats of the Pewter Metallics and got a wonderful coverage.
I stenciled the word using an Andy Skinner Stencil and 
Titanium White Americana Acrylic.
I added 3 coats of this because of the way I was stenciling.

What a GREAT gift idea for you to make.

So, you can't paint or letter?

This stencil offers several fun words that would 
make wonderful signs.  
Who doesn't like to see their favorite word 
displayed in their home?

Serendipity is a word that Mother taught 
me at a Young Age.

Being able to be a DecoArt Helping Artist and a 
member of the Blogger Outreach Program is a 
serendipity moment in my world.  

I love these products and am looking forward to more playing.


AND as a BONUS
Until October 31, 2016
Purchase $25 worth of the Americana Decor Products and get FREE shipping by using the code: DIY

The DecoArt Store has all of the new colors and products for sale.
The Americana Decor line includes: Chalky Finish, Satin Enamels, Outdoor Living, Color Stain, Metallics, Stencils, Waxes, Varnishes, Medium and Speciality Products.

I think you will FALL in love with these new products.
I can't wait to play some more.


I am simply Blessed to create~~charlotte♡



Tuesday, September 27, 2016

Tutorial Tuesday: Grateful Pumpkin

Who doesn't like to get some Happy Mail?

I got a box of goodies from DecoArt, Where I am a helping Artist and a member of their Blog Outreach Program.

I could not WAIT to try out the new items I received.

Projects started running through my mind, but really, 
that is nothing new.

I have said this before, but I have used DecoArt products for years. 
 I have probably bought thousands of bottles of 
DecoArt Americana as I prepped for craft shows.  
They simply were the best on the market!

Recently, I got rid of every bottle of my other paints that I bought when I couldn't get to the Mall to buy DecoArt...Sadly, 
Walmart doesn't carry this great brand.  :(

I thought of several things to paint, but I decided that I would make my own "pallet" pumpkin.
Those pallets items are expensive!


I cut the plywood into the shape of a pumpkin.
You know, I most always give you a pattern, but really?  You can find a pumpkin shape anywhere AND you can simply draw one.  
An easy way is to draw a rectangle the size you want the pumpkin, Then take a piece of chalk and draw the shape--easy peasy!

After I cut the shape, I cut it into strips, and really, 
I am OK with knowing that they would not be straight.

I also cut 2 pieces of scrap 1x4s to size to use as braces. 

Again, nails don't bother me when they show.  
I would rather use nails than have my piece to fall apart.

With that said, you can simply glue and clamp, if you wish. 


I painted the pieces with DecoArt Americana Chalky Finish Paint in Cherish (the orange-ish color), Bestow (light green) and rejuvenate (yellow)


I took the 3 middle pieces and a White Charcoal pencil
 and free-handed my word of choice.


I painted the word with Chalky Finish in Honor.
All of my primitive painting friends, 
THIS is the color I think you will be excited to add to your stash!
It is a dark Navy--almost black and oh, so yummy!


I sanded it.
I Added some birds and branches using 
the Americana Feathered friends Stencil.

I Added the White Creme Wax--
oh, my, this is WONDERFUL stuff to give 
your project that easy white wash look.

It was too white for my taste, but no problem, 
I took the Clear Wax and rubbed it on top 
of the White Wash and it removed some of it!!


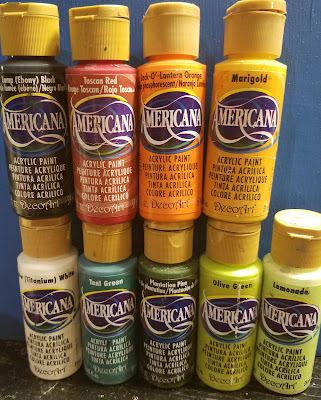
From Top to Bottom: Bestow, Cherish, Clear Wax, 
White Creme Wax, Honor, Rejuvenate, 
Ultra-fine Writer Tip on top of Titanium White Americana Acrylic.


Charcoal wanted to see the new colors I got, too.
Oopsie...there goes a bottle rolling...


Momma won't notice if I lie on top of the paint, 
but that bottle that rolled!  Ugh, what to do?!


I put a thin line around the pumpkin with that 
awesome Ultra-fine writer.
I can't wait to try it on top of Lamp Black to 
outline some of my designs!

The top cleaned easily!


This is the back of the piece painted with Cherish.
I LOVE the white washed surface.


This can either hang or it would be great to sit on top of the table with some other fall items around it.


I hope I have inspired you to try the new colors!
Many are available at Michaels, but you can also 
order from the DecoArt Store by clicking here.


Thank You, DecoArt.
I hope you like what I do with your products.
I am simply blessed to create~charlotte♡


Sunday, September 25, 2016

Serendipity Sunday: A Tomato


I would give my opinion of having a rookie/2nd year starting quarterback, but alas, none of my friends seem to enjoy football—wait, I am NOT enjoying Titan football…I am only going to say that GOOD THINGS take time to ripen…


With that thought, my friend Cheryl, has been patiently, ok, I am not sure patient is the correct word, but she has, nonetheless, been waiting for a LONG time for a tomato to ripen that was planted by nature.  Today, I scrolled through FB to find it had FINALLY ripened!  LOL  YAY, TOMATO!!


Seeing that beauty flooded my mind with memories…OK, you CANNOT be surprised by that comment.


My Daddy loved tomatoes better than most anything in this world.  We would plant about 50 – 100 tomatoes and let me tell you, planting them was not an easy task.


He would work the garden soil with his little red tractor, and add the needed fertilizer, and then find the proper place to plant them, since you had to move the crops around each year in order to get good growth.  For those who don’t know, each plant TAKES and GIVES something specific to soil, and it must be replenished in some way, so that is why things were planted at different spots each year.


It became my job to PLANT the tomatoes.  I would laugh as I looked behind me to see Daddy re-doing what I had just finished.  I didn’t say much, but at one point, I did remind him of my success at raising flowers.  He didn’t replant as many plants.  LOL


To plant the tomatoes, we had to put down the black plastic sheet and then put soil around the edges to ensure it wouldn’t blow away.  After that, out came the scissors, or Daddy’s ever present pocket knife, to cut an X in the plastic and plant the tomato plant DEEP into the soil.  It was watered with a cup of miracle grow laced water.


The homemade tomato cages were gathered (pulled from the weeds), a stake was driven beside the freshly planted tomato, cage placed over the tomato and tied to the stake with ORANGE bailing twine. THEN, bails of straw were drug to the garden and placed on top of the plastic—WHEW!


The watch for the ripe tomato began instantly, because July 4th was the targeted date.  This meant the possibility of having to cover the crop to prevent them being killed by frost—oh, the joys of Middle Tennessee fickle weather. BUT the end result was worth the effort.


After Daddy died, baby pear tomatoes would grow around the yard from him walking around, tomato in hand and his spitting the seed as he walked.


Today, I craved those days, but was thankful for the memories.


Food, as you all know is often the center of most of my memories, and today was no exception. 


I longed for a home grown tomato on a biscuit. That was Mother’s favorite thing.


I had some grated cheddar cheese on the stove and a small amount of Bisquick left in the box from making Charcoal sausage balls a few weeks ago (he reminds me to buy sausage next time, and now Bisquick).  I mixed the cheddar cheese, Bisquick and added canned milk, mixed together and dropped small mounds of dough on the cookie sheet.  Placed them in the 425 oven and cooked 8-10 minutes.


Oh, my goodness.  Even the little store bought Roma tomatoes I had tasted heavenly!


This turned out better than my last food memory.


I saw the can of tamales and remembered what a treat it was for Daddy to have them in the winter in a bowl of chili.  I was “fascinated” as a child by the PAPER that was wrapped around them. 


I didn’t have the chili, but I ate the tamales and laughed at me.  They were ok, but not nearly as good as the memory!


Sometimes, memories are better than reality.


Time is often a good friend that allows us to forget some of the frustrating moments and cleans our heart of the bad details and fills the void of reality with love.  I don’t think that is necessarily a bad thing.


So, I guess today, I choose a rogue TOMATO “grown” by Cheryl as my Serendipity moment of the day.


Cheryl's prized tomato


I can’t express my gratitude enough for my parents giving us such a happy life.  They chose US over material gains.  We had everything we needed, and too much of what we wanted, but again, that reminds me of my mother saying she had always had everything she wanted—she just knew WHAT to want.


I watch these stupid court shows, and the news and wonder WHAT we have taught the children about things that matter.  Sadness overtakes my heart when I see the lack of quality to so many lives, and what people expect from life.  I read post after post about needing Prayer back in classrooms and so on, but the real truth is that nothing will get better UNTIL Prayer and Wholesome values are brought back into the homes, and Parents start spending time with their children, teaching them by EXAMPLE of what a Quality Person is.  CHOOSE a MATE with as much thought as you choose where to eat!


It DOES take a village to raise a child, and I think that is what is missing.  Nobody seems to want to listen to each other.  We tend to firmly plant our feet in the ground and yell, NOT MY CHILD... or DON’T take away my child’s rights!  Oh me...we have a world BEGGING to be loved and disciplined.


My prayer is that EACH one reading this will do their part (yes, I speak to ME in these posts more than anyone) in changing their little corner of the world by changing themselves.  Focus on qualities that matter.  Look at the seed you are planting.  We have GOT to get back on track and start realizing that JUST because “it feels good” doesn’t mean that it is GOOD.


I pray for you and for the parents who struggle to do what is right.  Evil is at every turn, but so is Goodness—CHOOSE Goodness, Kindness and LOVE.


Thanks for stopping by my little corner of the world.  I am simply Blessed to create~~charlotte♡


painted by Cheryl, of course! :)

Thursday, September 15, 2016

Tutorial Thursday: Witch Ornament

One of my favorite things about social media is finding some amazing artists.  I love those who share techniques and tips--that is the kind of person that I like and want to be like.

I also tend to gravitate toward those that are Christ Followers.  The same was true when I would buy books.  I read the acknowledgement to see what kind of person they were.

One of my favorite people to "follow" lately, is Mindy Lacefield.  Her style is so far from mine, that it intrigues me.  A fb friend has been taking her 24 faces on-line workshop, and I find myself turning a bit green for not having money and being able to take classes, BUT then, I again, am amazed at the generosity of so many artist who freely give of their time to share.  Be sure to let people know how you appreciate them when they share.

Mindy shared how she created an ornament the other day on her blog click here to go there.
I wanted to try it, so eventually, on a trip to the kitchen, I looked to see if I had any coffee filters.  

NOW, this is where we laugh.  I DID find some, and they were greatly discolored.  I tried to figure how long they had been in the cabinet, and I KNOW that coffee has not been made in this house for 14 years, and since they last so long, they probably had been there for about 6 or more years, since we only made coffee on Christmas morning, and maybe 2 more times...so, my question is: Does this make my ornament VINTAGE?  ROFL

I also, have had these ornaments for about 6 years too!  So I gathered them with the naturally stained coffee filters...


I used DecoArt Americana Decou-Page Matte.
I removed the tops of the ornaments.


I covered the ornament with the product and added
 pieces of  the torn coffee filter to the ornament.


I didn't care that the pieces were smooth or not-I wanted them to add texture.  I kept adding until I had covered the entire ornament.
I covered the top of the coffee filter with a generous 
coat of the Decou-Page.


Oh, and then, the fun part is getting to peel 
the "glue" from my fingers.  
Yes, I hope to always keep part of the kid at heart inside of me!!

I placed the ornaments on dowels to dry.
I had time to give my baby a Peanut Butter/Jelly sandwich.

This is the dried ornament.


I painted it with white Gesso.


Then with Jack-o-lantern.
I used my favorite "tool", Dry Wall Tape as a stencil 
to add texture with Marigold and White.


These are the colors I used to paint my ornament.


After I finished painting, I added some of Neons Fiery Red and Metallic Lustre in Orange Flicker.  I will brush several coats of Glamour Dust on the ornaments later--it messes up pictures...

How fun is this?

I don't do scary Halloween.
I try to keep everything I paint as Happy!


I hope this will inspire you to use those 
glass ornaments in a different way...
adding just a bit of texture can make a big difference!


Thanks for stopping by my corner of the world!
I am simply blessed to create~~charlotte♡


Tuesday, September 13, 2016

Technique Tuesday: DecoArt Americana Chalky Finish

I cut out some wood yesterday and I saw this little creamer I had bought in the past for 49 cents, so I gathered it with my wood and carried it to my painting table--what is one more thing in my pile, right?

I had decided that I was going to use Chalky Finish Paint to paint the scarecrows I was making, so I quickly cleaned the little creamer and also grabbed a baby food jar, that--surprise, surprise--was also sitting on my painting table!  LOL

I thought this would be a good test to show you WHY I love DecoArt Chalky Finish paints.


New Life is one of my favorite colors.

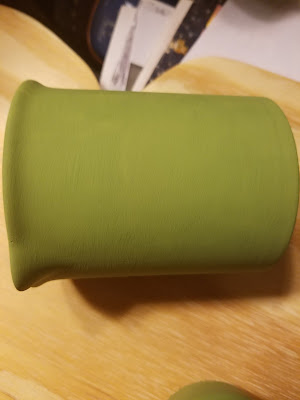
These are the colors that I used to paint my little projects.


All I did was clean the items.


This is the first coat--don't lose hope--it will be ok.
Be sure to allow the paint to dry completely 
before adding another coat.

*IF your chalky finish has become too thick, simply add water.  I dip my brush in water and that usually makes it flow off my brush.

*No, you simply start painting--you don't have to prep the surface, except for making certain it is free from dirt/oils.


I think I added 3, maybe 4 coats of paint to the project.  
It dries so quickly, that it is easy to lose count.

This shows the first coat to the top of the baby food jar--
no problem painting on metal, either!


This shows the second coat applied--pretty amazing, huh!


See how smooth this is!  
Yes, sometimes the brush strokes show when painting, 
but you can prevent this by thinning the paint more...
Personally, I like just a bit of the texture it creates.


I decided after I got the baby food jar painted, 
that I wanted to make an ornament.  
I drilled a hole in the top.
I Gathered a piece of ripped homespun material for a hanger.
I found a stylus to use to push the material through the hole.


I used needle nose pliers to pull the material through 
and tied a note in it.


I free-handed the message with a White Charcoal pencil and painted over it with Titanium White Americana Acrylics. 
When the paint dries thoroughly, I take a clean flat brush, and wet the surface and it removes the White Charcoal pencil...
just carefully wipe it dry.

*Yes, of course you can use DecoArt Americana Acrylics 
on top of The Chalky Finish Paint!  
DecoArt Chalky Finish Paint is one of my favorite ways 
to create a background!


I drew a branch and added some pine needles and berries.
I flecked Titanium White onto the entire surface, 
placed the top back on and WOW!!
Isn't it adorable??!!


I found a saying that I liked and wrote it across the top of the creamer...
Added flowers...
Sealed it with DuraClear Soft Touch Varnish.


Of course, I wouldn't leave you hanging without 
giving you a little pattern.  LOL
I do, however, wonder if anybody has ever used 
one that I have given to you!  =)


Oh, well, we will pretend that they make you 
happy to get them, and leave it at that!!

I wish you a wonderful week and 
I hope you get to create SOMETHING.

I am simply blessed to create~~charlotte♡