Pages

Sunday, December 31, 2017

What will you be eating on New Year's Day?!


I have spent the day getting ready for my New Years Day Meal.

I am not superstitious,  but why take a chance~wink wink~


I am sure the tradition of eating certain foods isn't only a Southern "Thang", but I do imagine the foods are different in other areas of the country, and, yes, the world.

At my house, Momma always made turnip greens, black eyed peas, hog jowl and cornbread.

A few years back, I was astonished to find that cabbage was an acceptable alternative to turnip greens after all those years of chocking down those yucky greens!

So, can someone explain to me WHY I cooked turnip greens, today!! 🤤

I did buy a head of cabbage,  you know, just in case!


While I don't like turnip greens, I do love cooked turnips, and I cooked some today as my treat!  That is another of those food memories for me.

Surprise,  surprise, right??😉

I cooked a big pan of hog jowl to add to my turnip greens and to the black eyed peas.

On New Year's Day, I will make a skillet of cornbread, and maybe yellow rice to make my peas into hoppin' john...oh yum!!!

I also cooked a few apples, cause Aunt Sybil said to always have apples with Pork, so, I most always do! 😁

I thought I would share a bit of the history of these foods, in case you wondered why these foods are often eaten on January 1.


The tradition of black-eyed peas for Southerners is believed to have originated back during Civil War times when Sherman's soldiers raided Southern homes, taking virtually all of the food and burning the crops, but mostly ignoring the fields of black-eyed peas, because they thought them to be food for the livestock and of no value otherwise. As one of the few food sources left to sustain the people and the southern soldiers, those black-eyed peas came to represent good fortune.

The black eyed peas (any cowpeas, really) represent coins. In olden days 😁😂🤣, a coin was placed in the peas to be found. I don 't think that would be a good idea, in this day and age.

The greens represent paper money, and the cornbread represents gold. Eating these foods is thought to bring prosperity for the year.

I need to see why pork is eaten--maybe another symbol of wealth??...

Y'all hum the JEOPARDY theme while I go look...

Dum dum dum dum....


Ok...pork is thought to symbolize posperiety, because pigs root forward!

Who knew!

But, don't eat chicken, cause they scratch backwards! 😲

Yes, this is fun, and I know we all need some fun in our lives.


Logically, this can't work, but there is, in my opinion, some truth to this belief.

I believe in the power of positive thinking.


I know the feeling of hopelessness.

If eating a certain food can make one BELIEVE something good is going to happen, what does it hurt??

I believe we find what we seek.


So, Y'all know what I will be eating on New Year's Day!

Also, know that I am claiming every blessing that will come my way in 2018.

I wish, for us all, that we will CELEBRATE each day as it comes, and to cherish the moments and the people in our lives.

I hope we will CELEBRATE the things we have in common.

May we offer the same grace that we will be given.


Let's laugh more and whine less.

Let's accept the flaws in others, cause, honey, we ain't no perfect specimen!

Let's help others when we get a chance.


Listen to that small, still voice.

God has given most of us good sense, so Let's use it! We will help the others the best we can --bless their heart! 😉

Let's make time for each other...for the things that matter.

Wipe from your vocabulary, "I don't have time." We do EXACTLY what we want to do!

Practice Random Acts of Kindness.

Think of others and practice kindness and hospitality.

LOVE yourself.

LOVE yourself!!

LOVE yourself, so you can love others!!

You are an awesome creation  molded in the image of God.  That is how special you are.

You ARE LOVED.

Thank YOU for crossing my path. Maybe we don't see eye-to-eye on things, but we can learn from each other...maybe to just cross the street, but that is ok, too. 😉

Thank you for the words of encouragement you have given to me. I hope you know how much it means to me.

I hope to be better, because of YOU.

Now, Let's CELEBRATE LIFE!


Happy New Year!

I am simply blessed to create~charlotte♡


Friday, December 8, 2017

Hands to serve Him


I have been doing a 
LOT of mixed media, lately.

I enjoy it.

Well, some of it is not my favorite, but I leave that alone-😀😁😂🤣😃

I made this mitten as an ornament, several years ago. 
I have sold LOTS of them.

I know...my friend keeps asking for a pattern.😉🙄😕😛

Maybe this will work.😁😂🤣😃

This is one of my most 
favorite sayings.

I will never apologize
 for sharing my faith.

I look at my art as
 an extension 
of my ministry.

I typed my saying on a computer.

If you have a laser printer, then you can just decoupage it onto your project.

If you have an ink jet printer, you will need to spray your copy with a couple of light coats of clear spray varnish, preferably matte or satin.
If you do not do this, it will smear.

These pictures show what I used.
You adjust to what you have
and what you like.

My surface was a 4 inch canvas.


So, begin by painting your back and edges of your surface 
with the color of your choice.
I used Extreme Sheen on mine.


Tear small pieces of decoupage paper.
I use small pieces to add texture.
Use a whole piece if you wish.
Use paint if you don't want to use paper.
Attach them with Matte Decoupage.


Apply your colors of choice. 
It takes very little media paint.
I also thinned it a bit with water.
I despise wasted paint, so I used just a drop or two of each color, adding more if needed.


Cut out or paint your mitten.
Color as you wish.

I cut the heart separately.

Attach with Matte Decoupage.

I like to dry brush 
my edges with Payne's Grey.

I outlined the 
mitten and heart 
with a 
medium charcoal pencil.

The words were attached 
and lightly painted, 
because of the 
bright white paper.

If you use a Charcoal pencil, 
be sure to 
spray varnish
 your project
 so it won't smear.

Have fun putting 
your spin on a 
similar project.

I am simply blessed 
to create~charlotte♡


Yes, by all means, resize it as you wish.

It is always a kind thing to give an Artist credit when you make something similar from their pattern or instructions.😉🤗


Tuesday, November 28, 2017

Gingerbread Ornament

As a member of several groups, I see the same questions over and over, but I guess it is true, if you don't know, you don't know.

My question is: what have you done to find the answer?

😁😂🤣😃

Basically, you have 2 forms of surfaces: wood type, or unslick, and glass/plastic types, or SLICK.

If you have a non-slick surface, basically, paper, wood or mdf, then the choice is yours to seal it or not. If it is a more porous surface, or, a surface that "drinks" your paint, then, yes, by all means, seal it, or you will be painting for days, and quite possibly will never get an even coverage.

Seal it with an all-purpose sealer. You can even mix this half/half with your base coat for the first coat. This isn't a bad habit to make!

Now, slick surfaces. 

If it is slick, then you MUST prepare your surface in some way to give it a "tooth", so your paint will have something to hold it in place. 

What  are some slick surfaces?

Metal, glass, vinyl records, plastic, slick mdf, candles, soap...


Today, I will share ONE of many ways to paint on glass.

My favorite product for painting on slick surfaces, especially plastic dominoes, metal and glass, is to use DecoArt Paint Adhesion.

CLICK HERE to go to the #decoart website to order

You simply mix it with equal amounts of Acrylic Paint, and basecoat it. I base coat it again with straight Acrylic paint, and paint as I normally do.


I love this product! 

This sweet gingerbread is painted on a flat glass ornament that I bought at Hobby Lobby--half price, of course! 


I mixed a small puddle of Paint Adhesion with the same amount of my base coat, Honey Brown this time, and using an old scruffy brush, I stippled it on, because that is the look I wanted.

Note: the fact that I stippled on the paint, gave it some texture, or "tooth", to help more by giving the top layers something to hold onto! Lots of people will sponge on the basecoat for this reason.


Since I didn't get a complete coverage, I used the same mix to again stipple my ornament, but I picked up a lighter brown, Camel, to mix with it to give it the look of texture.


Be sure to allow both colors to show, because you don't want mud!

Some people forget that Fast, Fun and Fabulous painting does not have to be boring! 😉


I started adding the face.

PLEASE purchase a good liner, and learn to use it. It makes a world of difference in the quality of your work. 

I suggest an 18/0 liner. 


More details were added, and again, I strongly suggest learning how to float color.

Highlighting the eyes, top of the nose, and mouth add such quality! 

There are many videos on you-tube.

Any Mogish has an excellent video on her blog.  It isn't the method I use, but it is worth learning her way.


Adding the icing is always fun. Again, done with a 18/0 liner. And those eyelashes! 😲

The comma strokes were done with a #2 Round --another must have brush for me.

Again, floating shade around the eyes, icing, under the nose, under the mouth adds such dimension, and will set your work above! 

Learn to float--did I mention that? 😁😂


Have fun with eyes. 

Learn where to place highlights so that they look in different directions.

I can't tell you how much I can't stand to see Santa's with their eyes looking in their eyelids--heavy sigh...

Pinterest is filled with eye tutorials! I have a board on my pinterest account  (Charlotte Fletcher) that you can follow...


Now, aren't these adorable.

Look at the details on these cuties! 


But wait...the fur was a flying! 

Don't they look like Phyllis Diller?!

I LOVE THEM! 


Cuteness overload! 


Just because it is 
something easy, 
it can still be

FUN
FAST and
FABULOUS!

I am simply blessed to create~charlotte ♡


Saturday, November 25, 2017

How many of you get a text asking what kind of deodorant you use?

Well, today was my lucky day.
The reason isn't as funny if I explain it, so keep wondering! 
😁😂🤣😃

In the bag was a 
new tennis ball for Charcoal
A box of Little Debbie Oatmeal Pies
2 bottles of deodorant 
AND
This cute package of Napkins!


Yep, could NOT wait to 
create something 
with them...

Oh, wait...
people use them 
to wipe their 
hands and mouth??

What a waste!

I quickly separated the 3 layers
Cut out one section
Tore the edges
Yes, the tearing of the edges
 took longer 
than anything!🤤


 I grabbed my new bottle
 of Pewter Extreme Sheen
 because it matched 
that little line in the napkin.

When creating, 
you can get inspired
 by anything.
This time I tried to 
carry out the style of the napkin.

I based my
6 inch wooden canvas
with 2 coats.


I chose 3 colors of
Dazzling Metallics
that were similar
To colors used
 in the design.


I grabbed a piece 
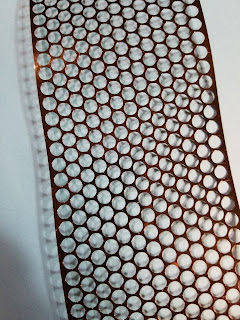
of my favorite "stencil",
 punchinello


I randomly added dots 
with the 3 colors, 
one color at a time.
Yes, I carried the 
dots to the edges.


I attached the napkin 
with DecouPage.


To carry out the style,
 I decided to add the 
blanket stitch
like was around the tree,
 to the edges of the napkin
 and to the wooden canvas.


Cool, huh?!

I decided the lettering
 needed to show better, 
so I went over it 
with a Gelly Roll Pen.

The stitching could have been done 
with this, also.

Be sure to use a 
Spray Varnish when using a pen! 
It will smear, if you don't.


Another 
Fast, 
Fabulous 
and FUN  
project!


I  think the sentiment says it all!


Thank you, Miss Wanda...

I am Thankful for YOU!

I am simply blessed to create~charlotte♡